> ## Documentation Index
> Fetch the complete documentation index at: https://docs.autosend.com/llms.txt
> Use this file to discover all available pages before exploring further.
# Unsubscribe Groups
> Unsubscribe Groups help you categorize your emails based on their purpose or audience.
Unsubscribe Groups in **AutoSend** allow you to organize your email communications so recipients can choose which type of emails they want to stop receiving, without unsubscribing from everything.
Unsubscribe Groups are essential for respecting user preferences and maintaining healthy deliverability.
***
## How do they work?
Unsubscribe Groups help you categorize your emails based on their purpose or audience.
For example, you might create groups like:
* **Product Updates** – for new feature announcements
* **Newsletters** – for regular content updates
* **Promotions** – for sales or special offers
* **Event Invites** – for webinar or meetup invitations
When a recipient clicks “Unsubscribe” from an email linked to a specific group, they’ll only be removed from that group’s emails and not from all your communications.
This ensures a better user experience and lets you continue sending other relevant messages to your audience.
***
## How to Create an Unsubscribe Group
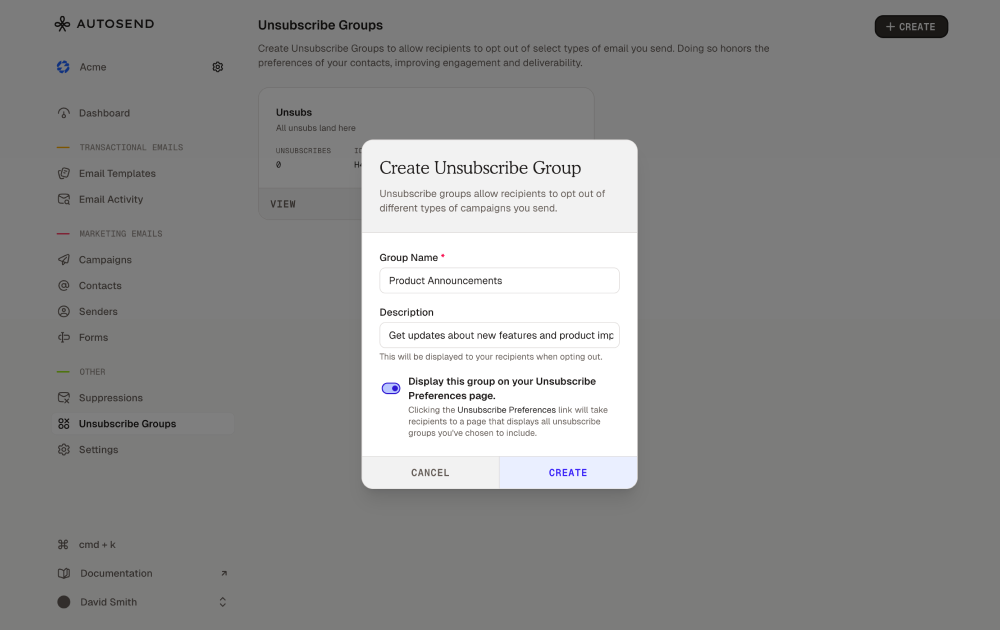
and click on the "**+ Create**" button to create a new Unsubscribe Group"
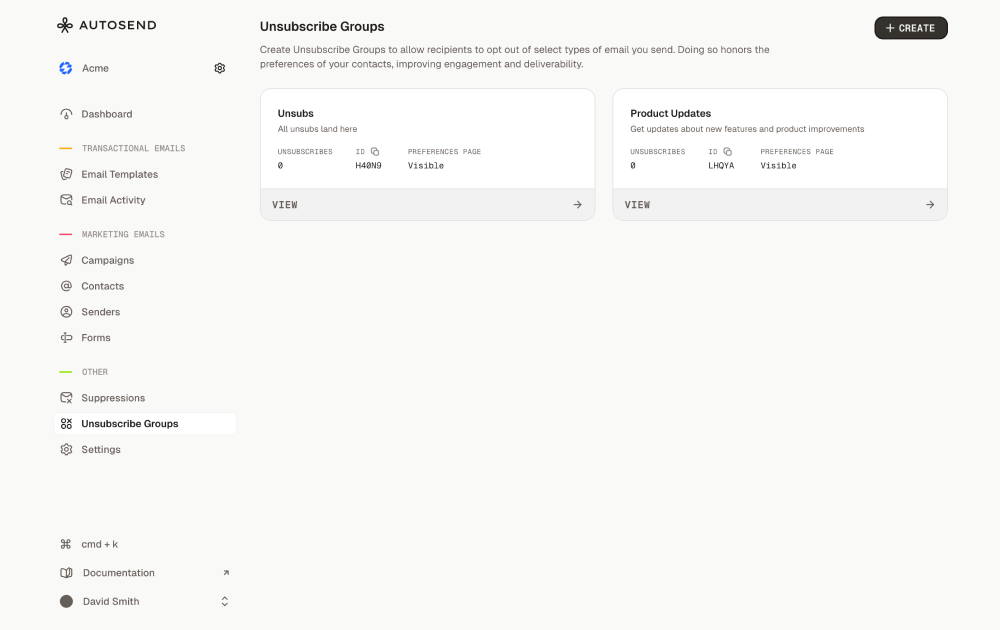 **Example:**\
Name: Product Announcements\
Description: Get updates about new features and product improvements
**Example:**\
Name: Product Announcements\
Description: Get updates about new features and product improvements
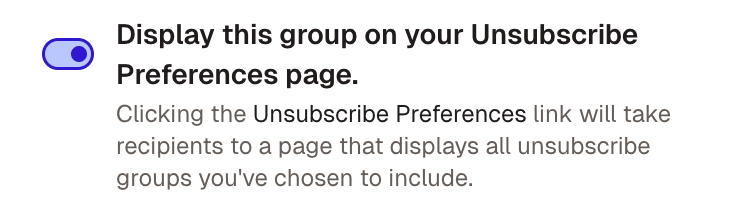
 Toggle to hide / show this unsubscribe group on your email preferences page.
 It's now available to associate with your marketing or transactional emails.
***
## Adding Unsubscribe Links in Email Templates
To stay compliant and let recipients opt out, every marketing email should include an unsubscribe link. AutoSend provides two merge tags you can use in any template:
* `{{unsubscribe}}` inserts a one-click unsubscribe link that removes the recipient from the **specific unsubscribe group** assigned to that email.
* `{{unsubscribe_preference}}` inserts a link to the AutoSend hosted **preference page**, where the recipient can manage all their unsubscribe groups in one place.
Both tags resolve automatically based on the unsubscribe group selected when sending the email, so you don't need to generate or manage these URLs yourself.
These tags output a URL only. Always wrap them in an `` tag (or use the email builder's link input) so recipients have clickable text to interact with.
### Using the Email Builder
You have two ways to add an unsubscribe link in the AutoSend email builder:
1. **Slash command** — Type `/` in the editor and select **Unsubscribe link** or **Unsubscribe preference** from the menu. AutoSend inserts the link with default text you can edit.
2. **Link input** — Select any existing text, open the link input in the right panel, and paste `{{unsubscribe}}` or `{{unsubscribe_preference}}` as the URL.
### Using Custom HTML Templates
If you're writing your own HTML email templates or sending via the API, add the merge tag inside the `href` attribute of an anchor tag:
```html theme={null}
It's now available to associate with your marketing or transactional emails.
***
## Adding Unsubscribe Links in Email Templates
To stay compliant and let recipients opt out, every marketing email should include an unsubscribe link. AutoSend provides two merge tags you can use in any template:
* `{{unsubscribe}}` inserts a one-click unsubscribe link that removes the recipient from the **specific unsubscribe group** assigned to that email.
* `{{unsubscribe_preference}}` inserts a link to the AutoSend hosted **preference page**, where the recipient can manage all their unsubscribe groups in one place.
Both tags resolve automatically based on the unsubscribe group selected when sending the email, so you don't need to generate or manage these URLs yourself.
These tags output a URL only. Always wrap them in an `` tag (or use the email builder's link input) so recipients have clickable text to interact with.
### Using the Email Builder
You have two ways to add an unsubscribe link in the AutoSend email builder:
1. **Slash command** — Type `/` in the editor and select **Unsubscribe link** or **Unsubscribe preference** from the menu. AutoSend inserts the link with default text you can edit.
2. **Link input** — Select any existing text, open the link input in the right panel, and paste `{{unsubscribe}}` or `{{unsubscribe_preference}}` as the URL.
### Using Custom HTML Templates
If you're writing your own HTML email templates or sending via the API, add the merge tag inside the `href` attribute of an anchor tag:
```html theme={null}
Don't want to receive these emails?
Unsubscribe
or
manage your preferences.
```
AutoSend replaces the merge tag with the correct unsubscribe URL at send time, scoped to the unsubscribe group attached to that email.
***
## Benefits of Unsubscribe Groups
1. **Improved User Control**
Let recipients choose what kind of emails they want to stop receiving instead of opting out of all emails.
2. **Reduced Global Unsubscribes**
Prevent users from unsubscribing from every type of email just because one category isn’t relevant.
3. **Higher Deliverability and Engagement**
By allowing users to manage preferences, you keep your lists cleaner and your engagement rates higher.
4. **Compliance and Transparency**
Supports compliance with email regulations like CAN-SPAM, GDPR, and CASL by providing clear unsubscribe options.
5. **Better Insights**
Track unsubscribes per group to understand which types of content your audience values most.
***
## Best Practices for Unsubscribe Groups
1. **Create Clear and Logical Groups**
Keep your groups simple and easy to understand. Too many groups can confuse users.
2. **Use Descriptive Names**
“Weekly Newsletter” or “Product Tips” works better than vague labels like “List 1.”
3. **Always Assign an Unsubscribe Group**
Every marketing or promotional email must belong to at least one unsubscribe group to comply with regulations.
4. **Provide Context in Descriptions**
Explain what kind of emails the group includes and how often they’re sent.
5. **Monitor and Adjust Regularly**
Review unsubscribe rates to see which types of content may need improvement.
6. **Avoid Overlapping Groups**
Make sure each group serves a distinct purpose to prevent confusion and duplicate unsubscribes.