Overview
AutoSend’s team feature lets you invite colleagues to collaborate within your workspace. With the new roles system, you have granular control over what each person can access. There are two roles available: Admin and Member.- Admins have full access to the entire workspace — all projects, domains, members, billing, and usage.
- Members have scoped access. They can only access specific projects that an Admin has granted them, and can add or remove other members within those projects.
Roles & Permissions
| Capability | Admin | Member |
|---|---|---|
| Access all projects | Yes | Assigned projects only |
| Manage projects | Yes | No |
| Manage billing & usage | Yes | No |
| Invite & remove workspace members | Yes | No |
| Add/remove members in assigned projects | Yes | Yes |
How to Invite Someone (as an Admin)
Admins can invite new people from either Account Settings > Team or from within a specific Project Settings > Team.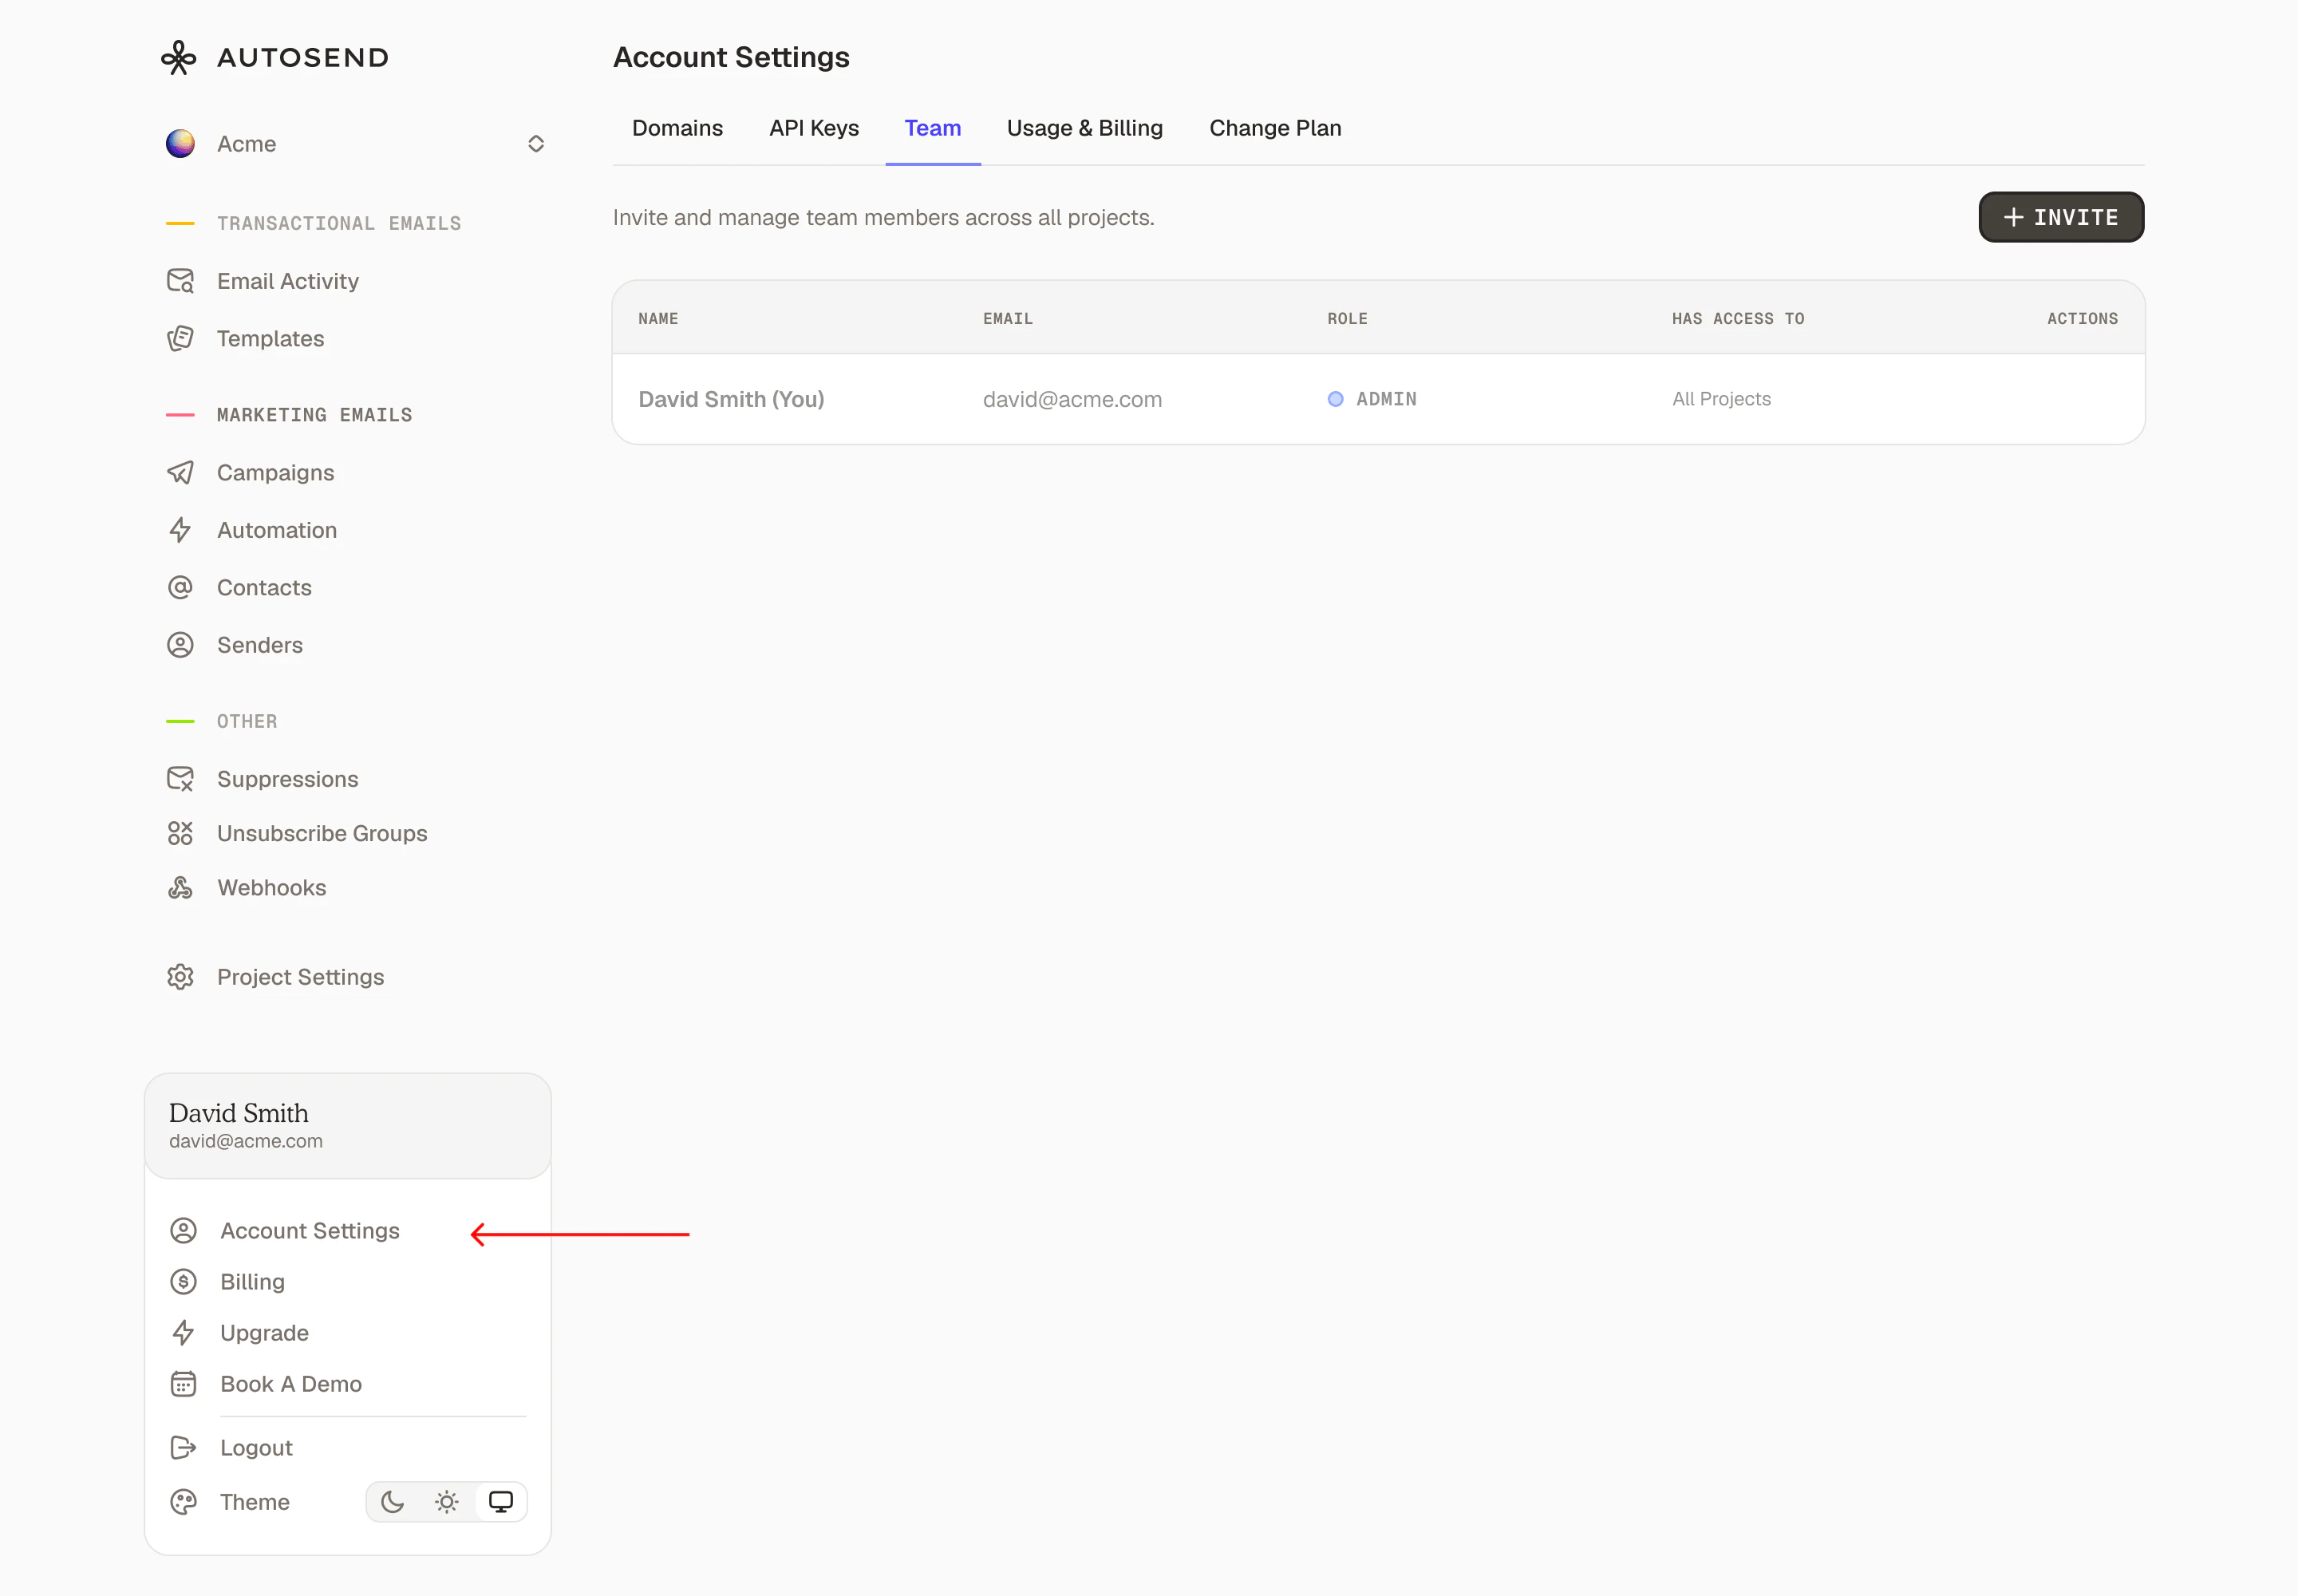
Click the Invite button in the top-right corner
Enter the following information about the team member you want to invite:
- First Name - The team member’s first name
- Last Name - The team member’s last name
- Email - A valid email address where the invitation will be sent
The email address should not be associated with any other account or workspace on AutoSend. Disposable email addresses may be blocked.
Invite as
Select Admin for full workspace access, or Member for project-scoped access.If you selected Member, select which projects this person should have access to.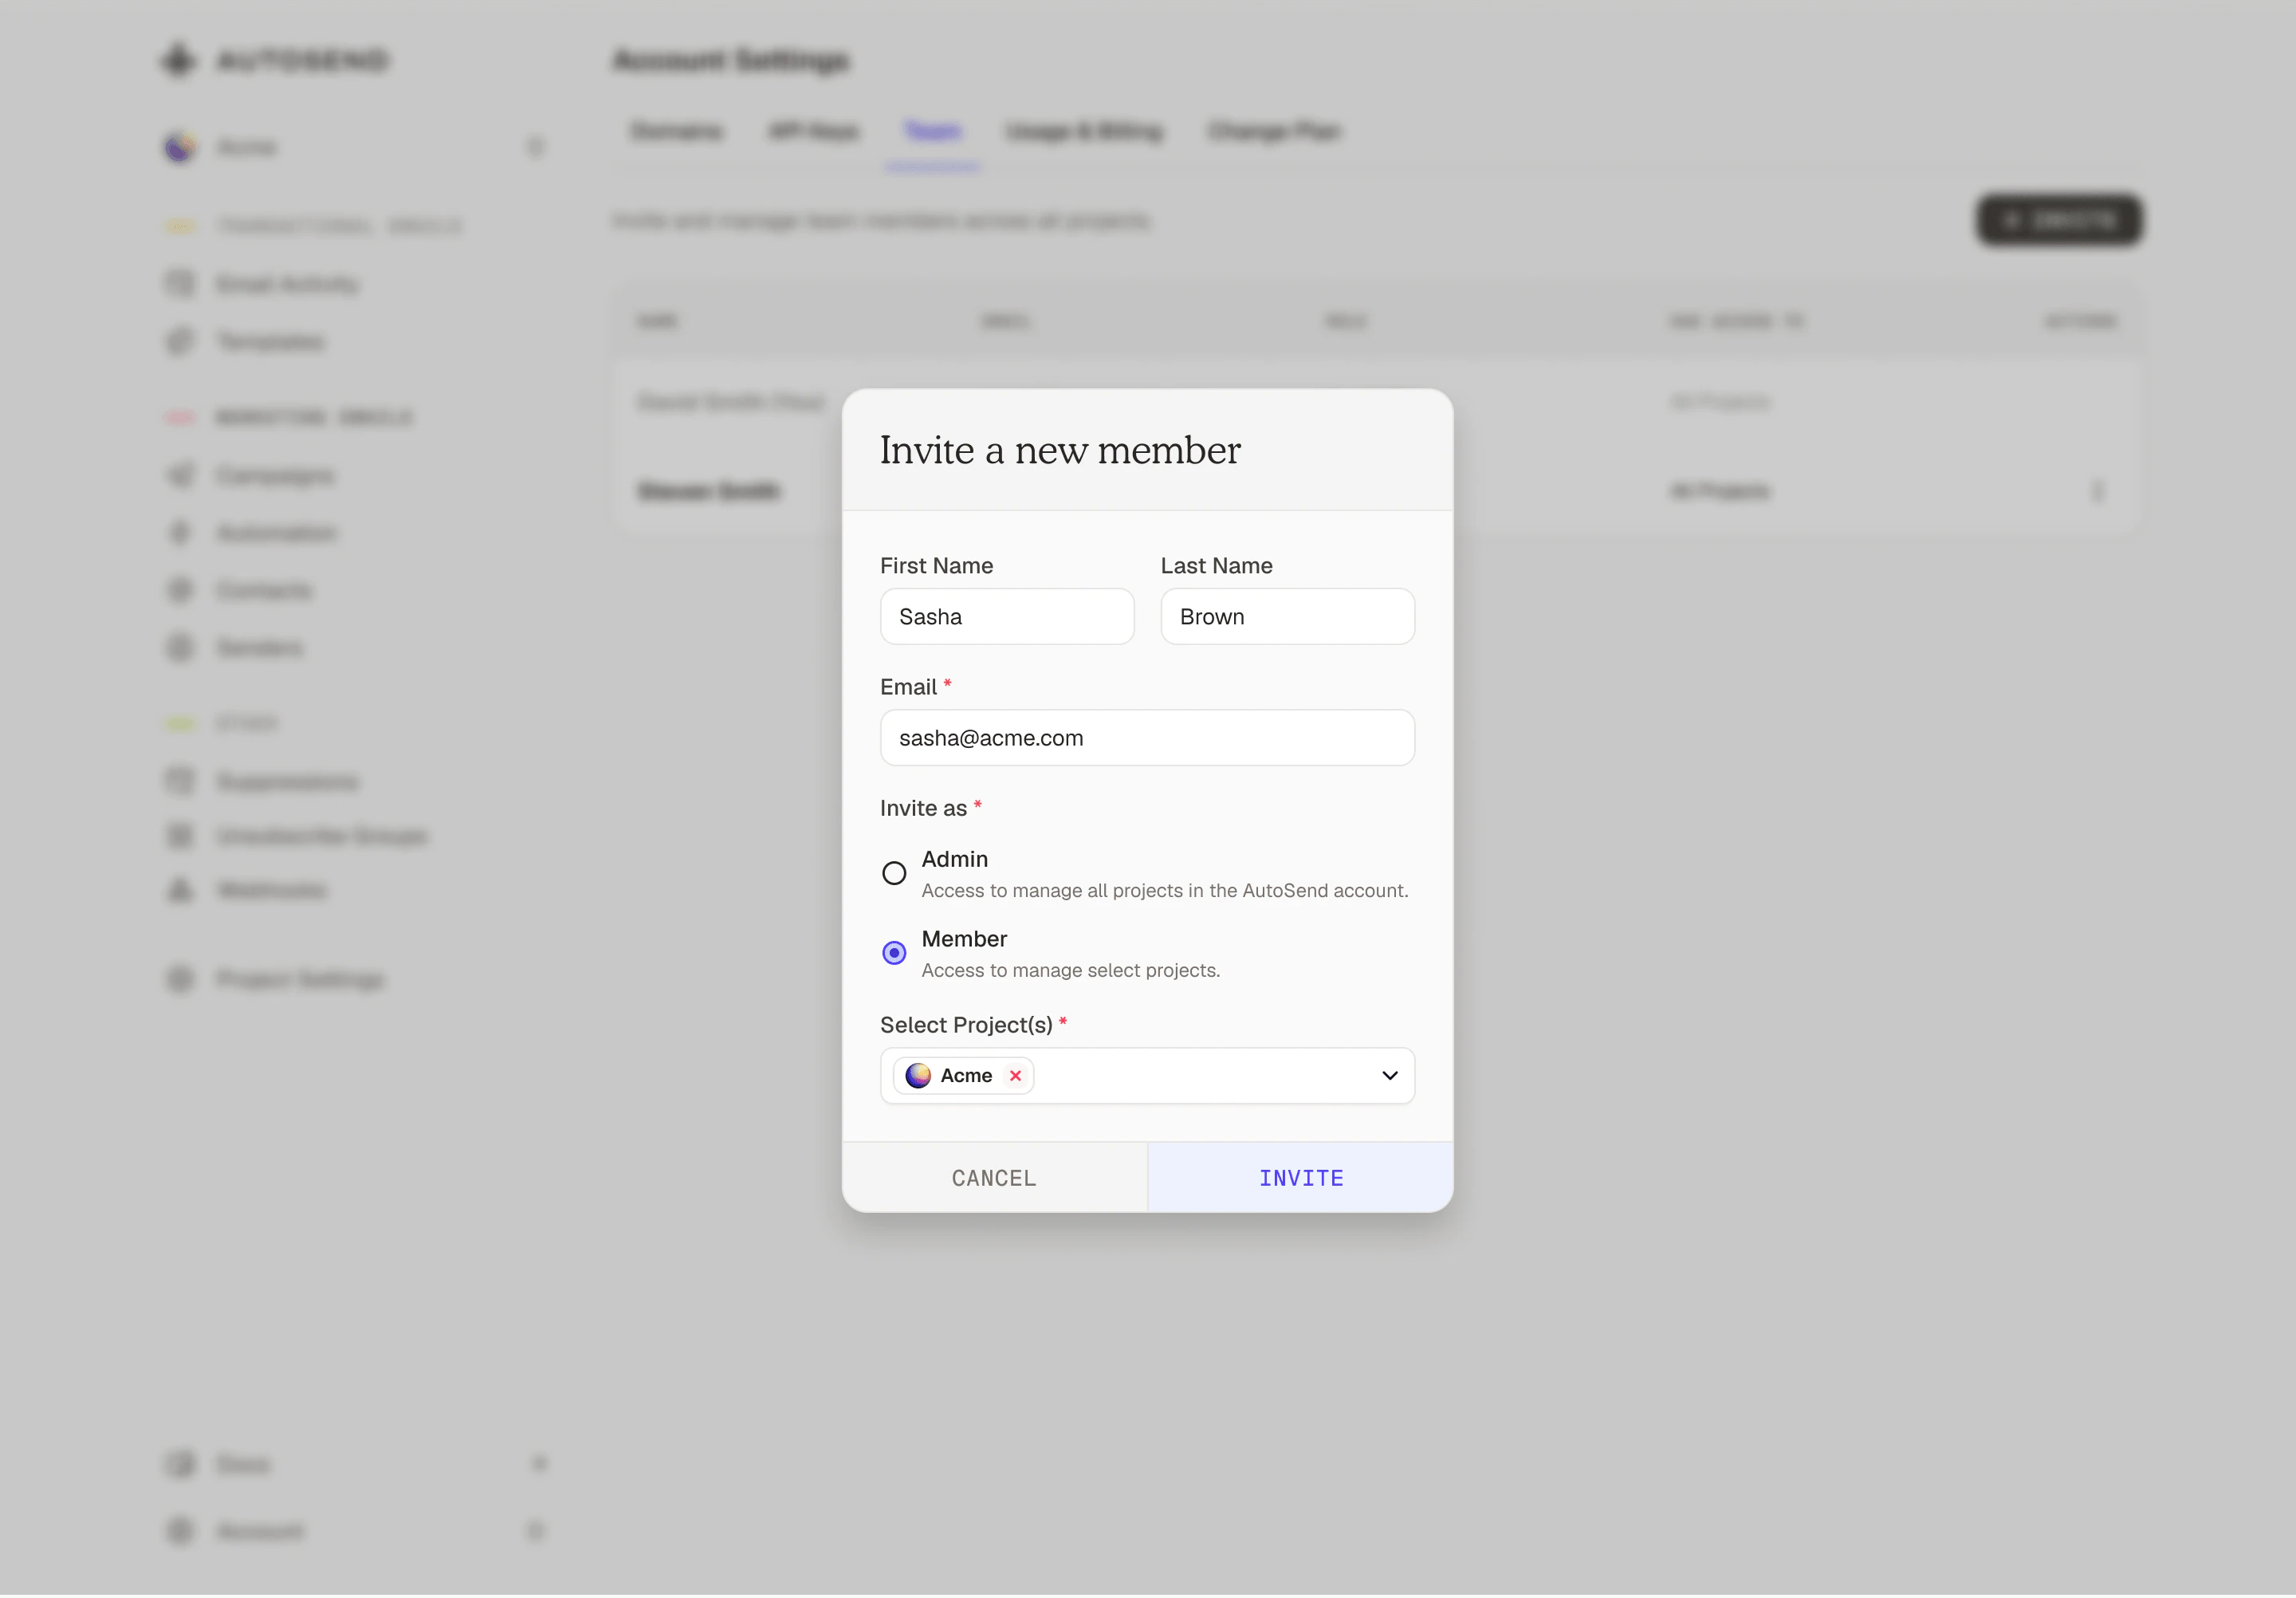
Admins can update a member’s project access at any time from Account Settings > Team.
How to Invite Someone (as a Member)
Members can add other people directly to their project from Project Settings > Team.Navigate to the project you want to add someone to.
Select the appropriate project from the dropdown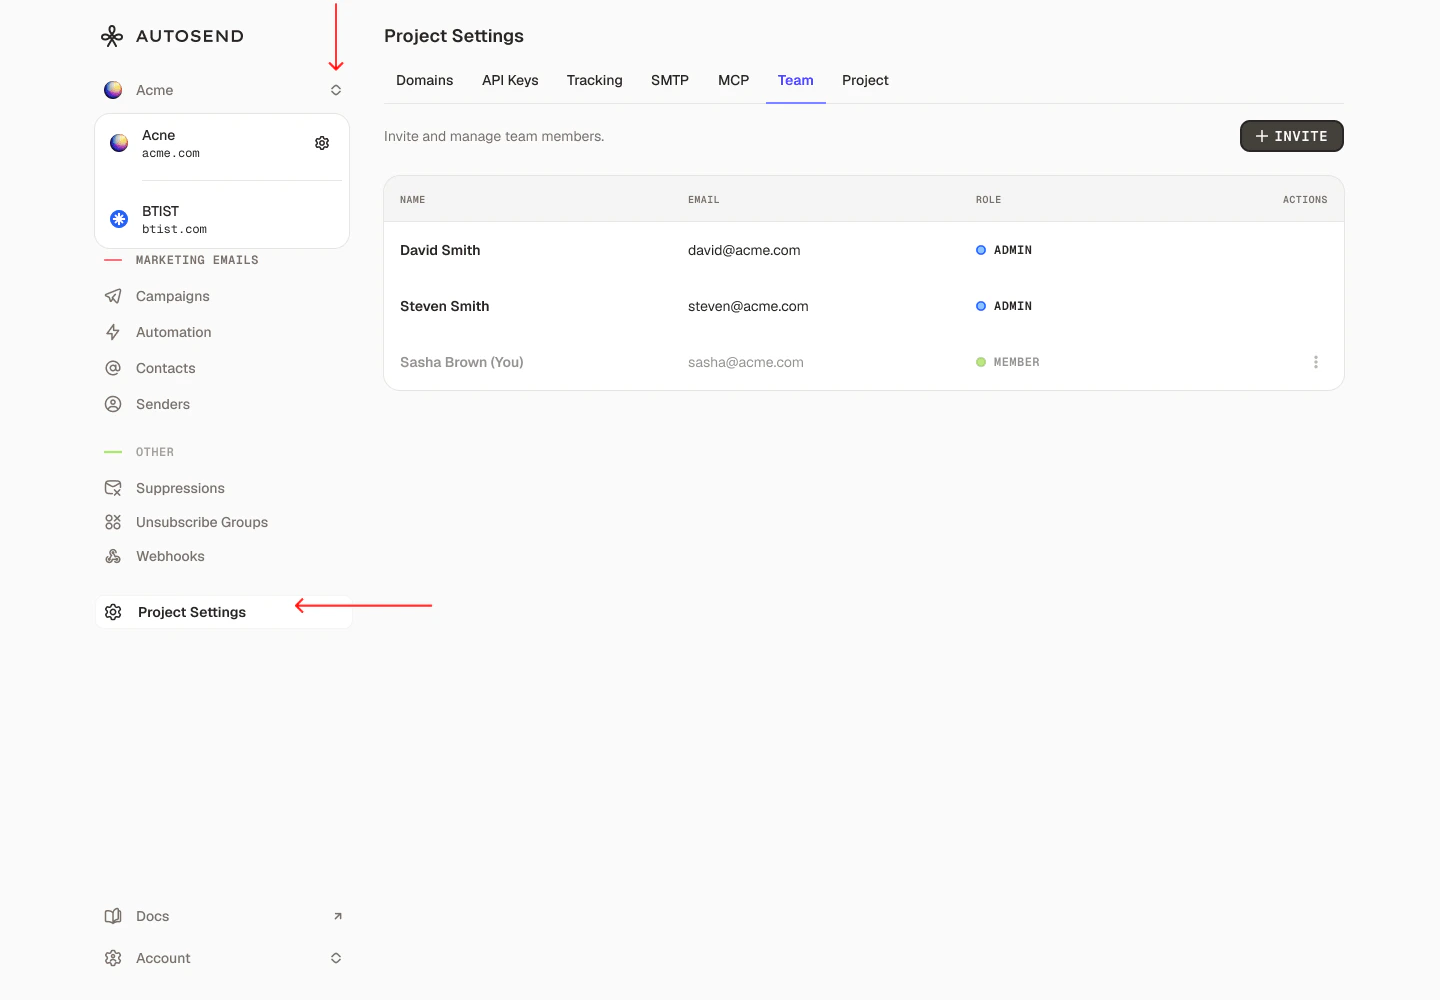
Click the Invite button in the top-right corner
Enter the following information about the team member you want to invite: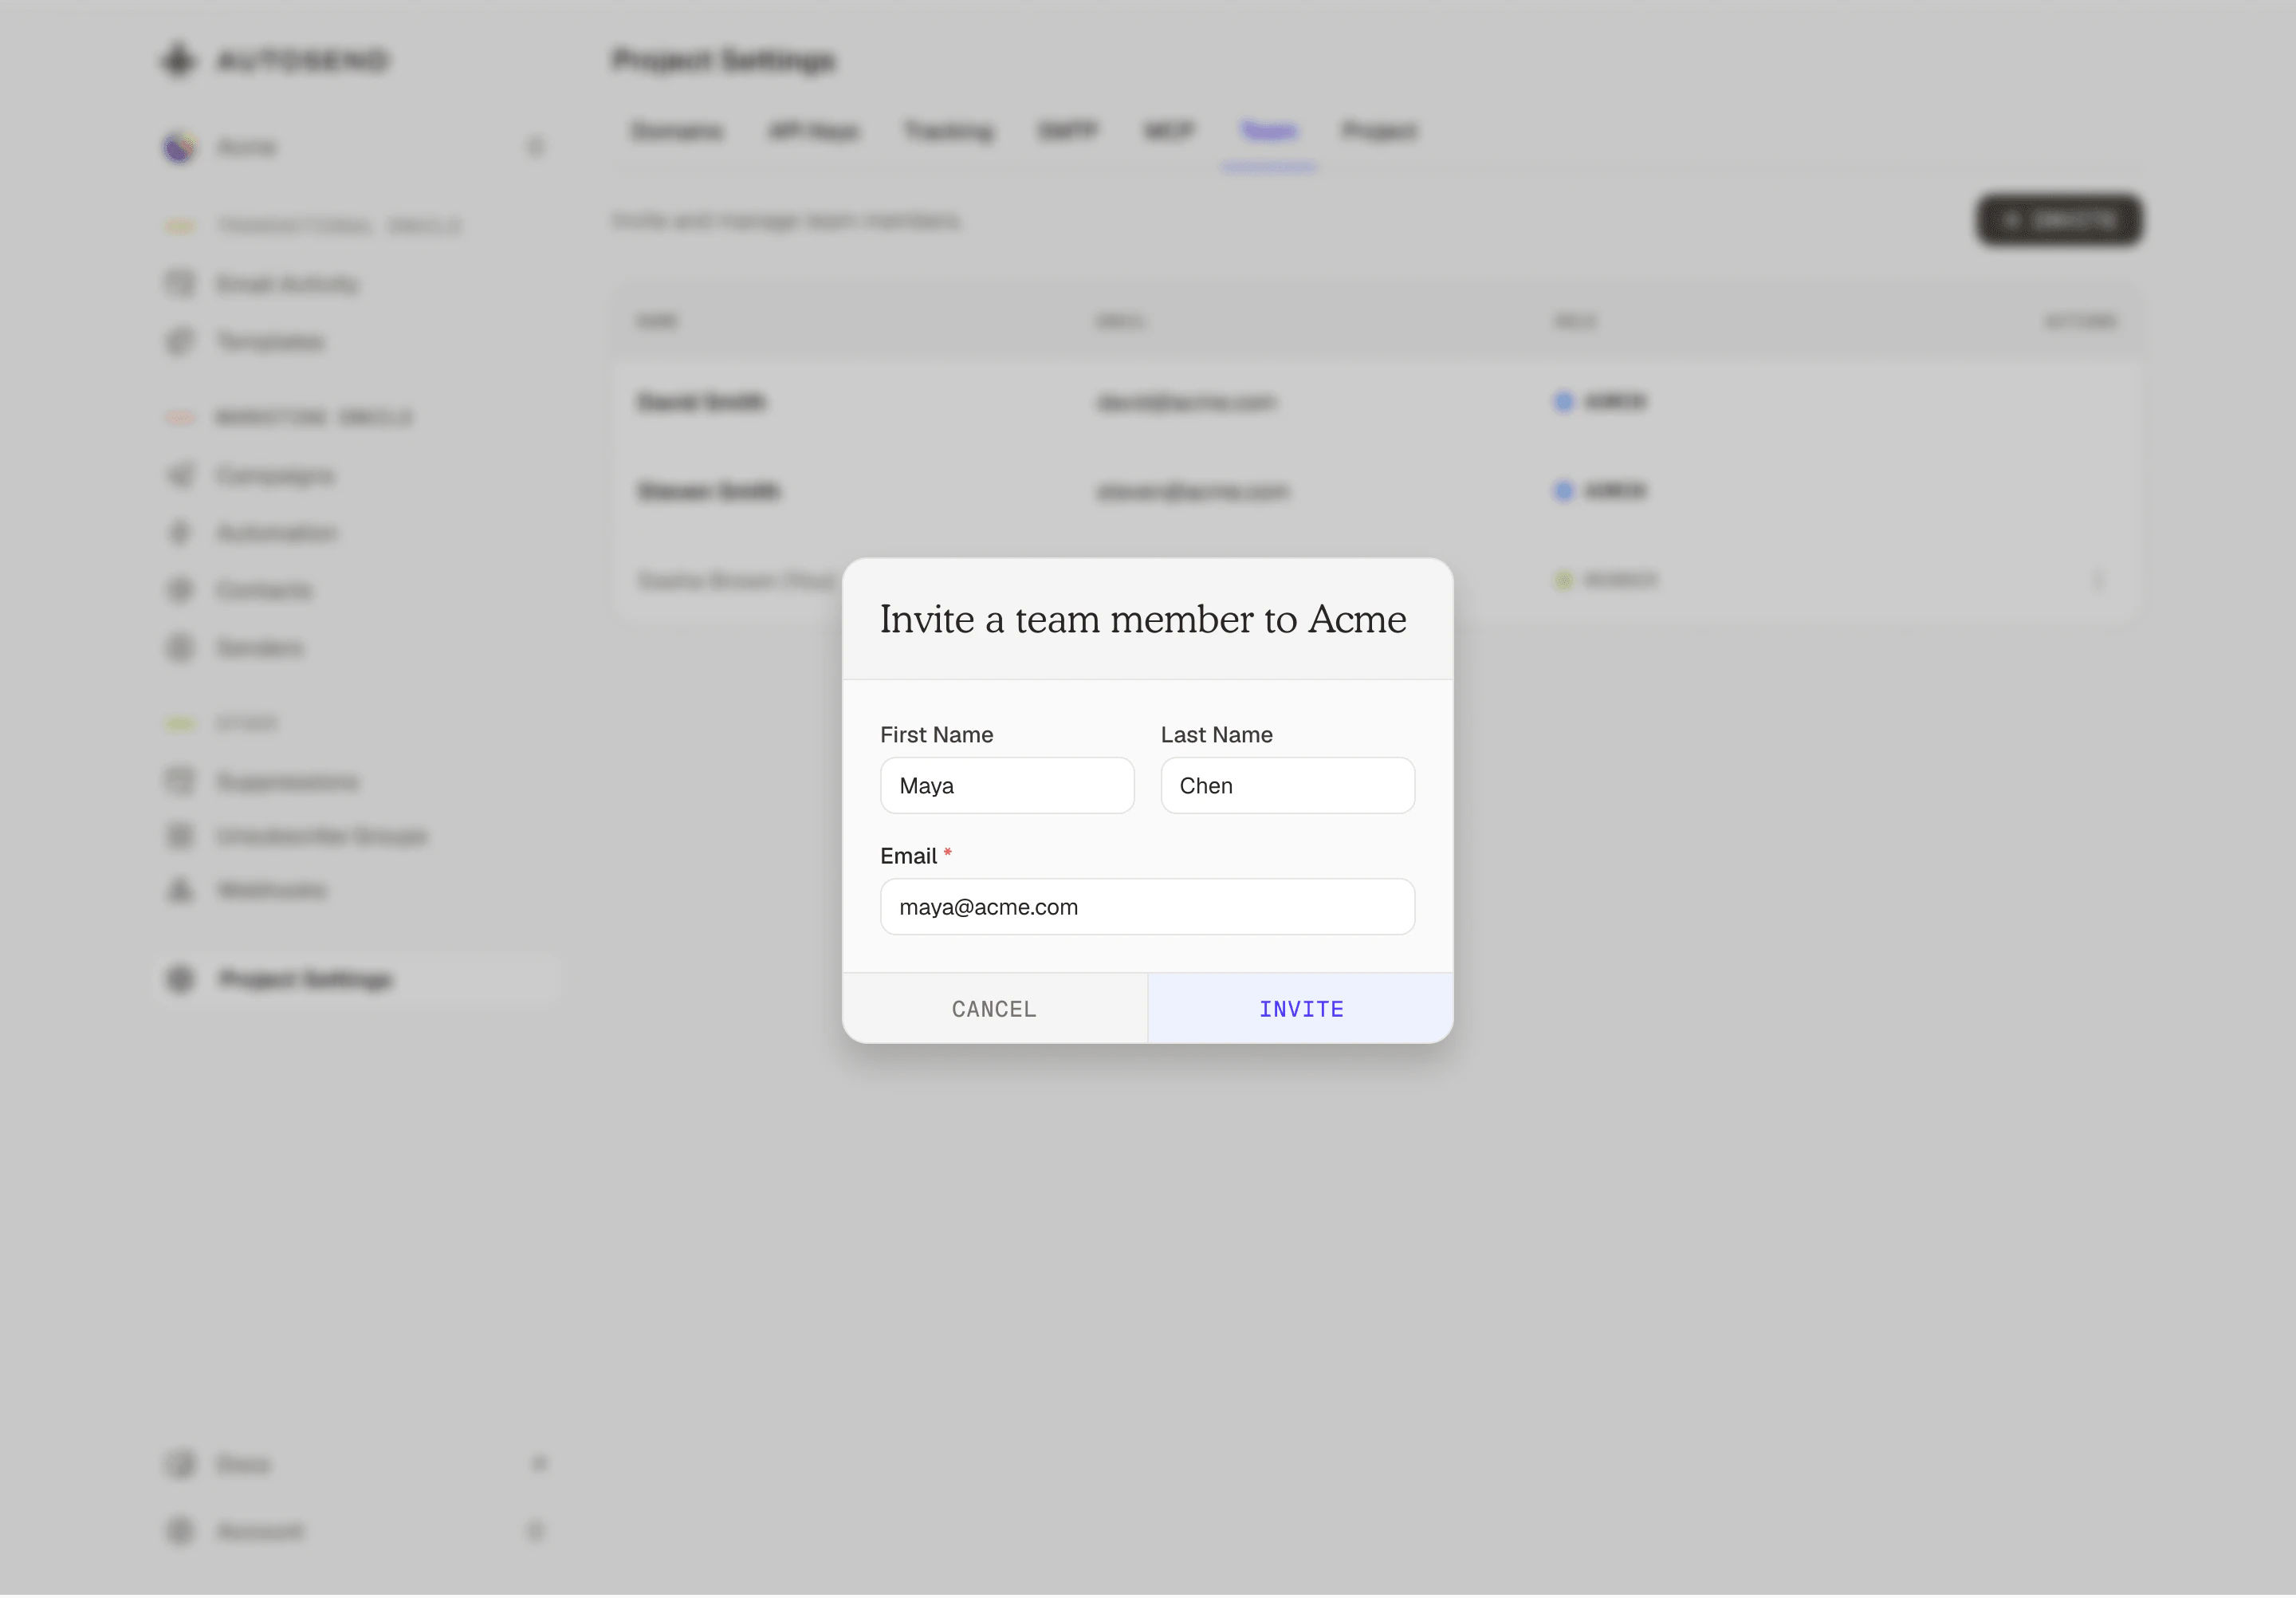
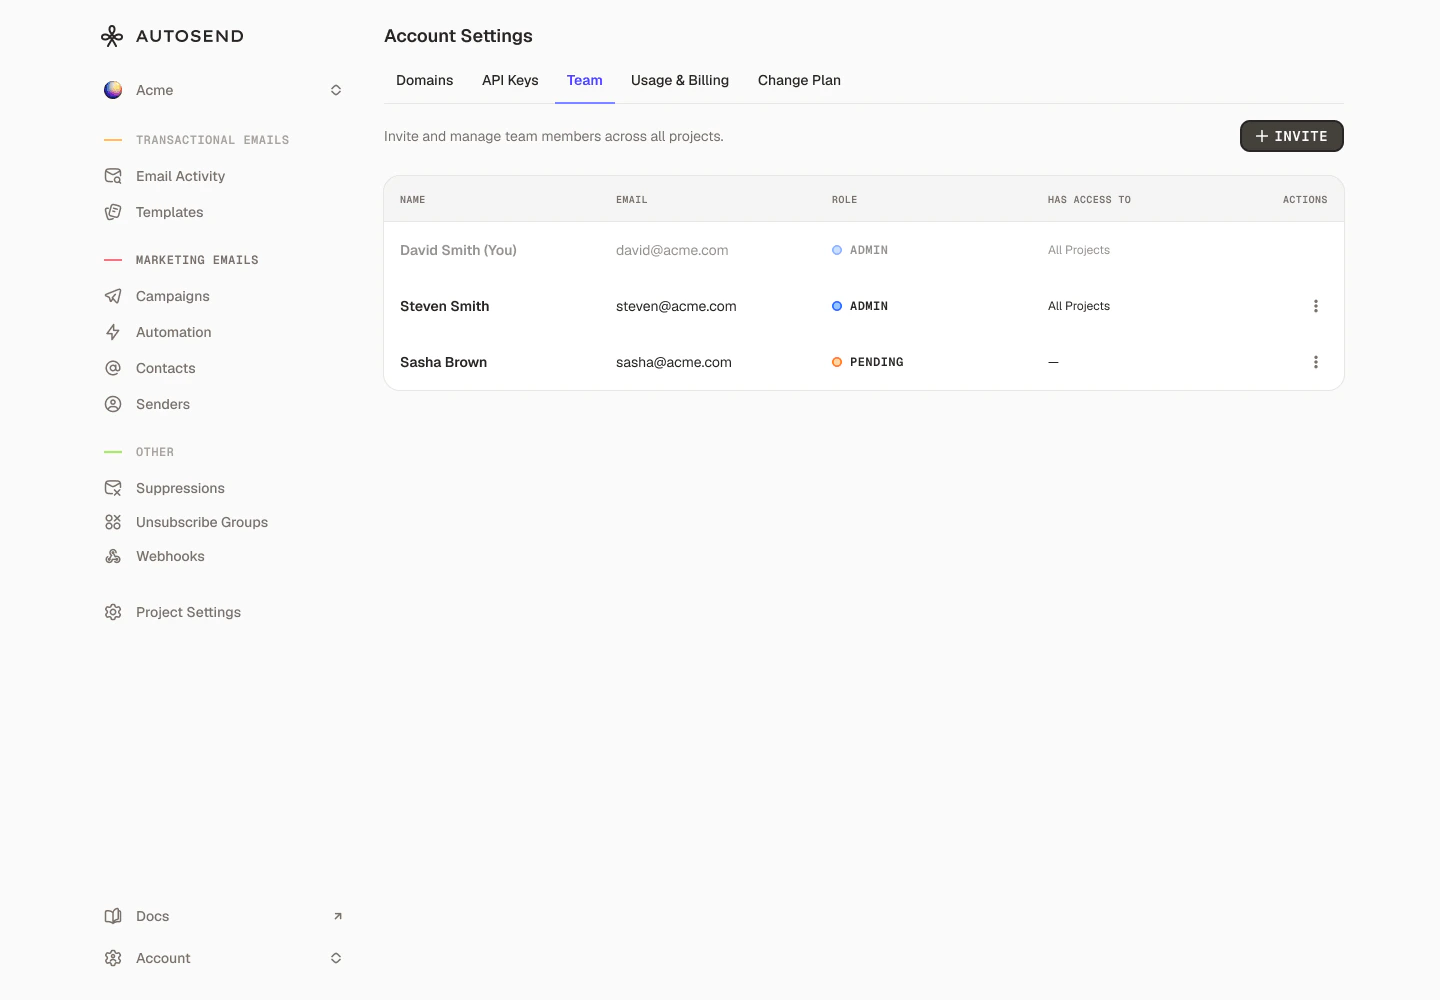
Invitation Sent
After successfully sending the invitation: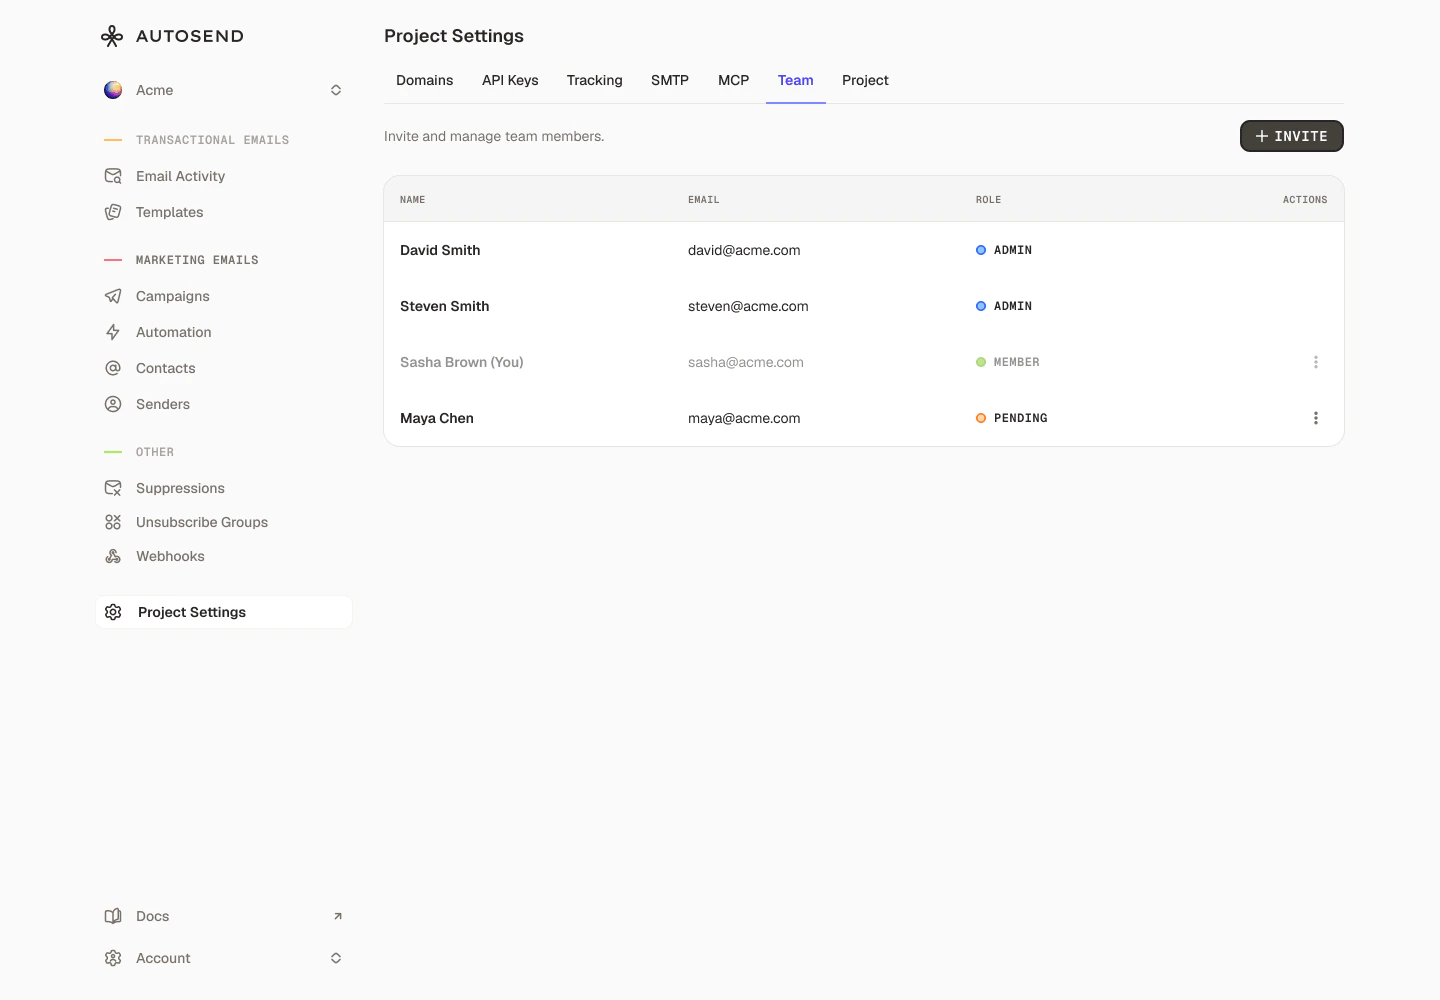
- The invitee will receive an email with an invitation link.
- The invitation will appear in your team list with a “Pending” status.
- You can resend or cancel the invitation.
- First Name - The team member’s first name
- Last Name - The team member’s last name
- Email - A valid email address where the invitation will be sent
When a Member sends an invite, the new person is automatically added as a Member scoped to that project. There is no option to choose a role or assign additional projects. That can only be done by an Admin.
FAQs
Can I change a member's role after they've joined?
Can I change a member's role after they've joined?
Yes, Admins can update a team member’s role from Account Settings > Team at any time.
Can I update which projects a Member has access to?
Can I update which projects a Member has access to?
Yes, Admins can edit a Member’s project access from Account Settings > Team.
Can a Member invite someone as an Admin?
Can a Member invite someone as an Admin?
No. When a Member invites someone, they are automatically added as a Member scoped to that
project. Only Admins can assign the Admin role.
How many team members can I invite?
How many team members can I invite?
There is no limit on the number of team members you can invite.
Do invitations expire?
Do invitations expire?
Yes, invitations expire after 7 days. If an invitation expires, simply send a new one to the same
email address.
How do I remove a team member?
How do I remove a team member?
Admins can remove any team member from Account Settings > Team. Members can remove other members from Project Settings > Team for their assigned projects.
Can someone be part of multiple workspaces?
Can someone be part of multiple workspaces?
No, a user can accept invitation only from single workspace. They have to use a different email if
they want to join another workspace.
What happens if I delete a pending invitation?
What happens if I delete a pending invitation?
The invitation link becomes invalid immediately, and the invitee will not be able to join your
workspace using that link. You can send a new invitation if needed.
Can I edit an invitation after sending?
Can I edit an invitation after sending?
No, you cannot edit an invitation after it’s sent. If you made a mistake, cancel the invitation and send a new one with the correct information.