What is branching in AutoSend?
By default, every contact in an automation receives the same emails in the same order. Branching lets you change that. You define separate paths inside a single automation, and each path has its own conditions, emails, and timing. When a contact reaches a branch, AutoSend checks their properties and sends them down every path they match. This means you can handle multiple cases without building separate automations for each one. A new user on a free plan and a new user on a paid plan can both enter the same automation, but from the branch onwards, each receives emails written specifically for them.How to branch your automations
Add a branch
Click the + button below any email in your automation. This gives you two options: Add Email or Create Branch. Select Create Branch.
Set the branch filter conditions
Click on a Branch Filter to open the condition panel. Each lane supports two filter modes: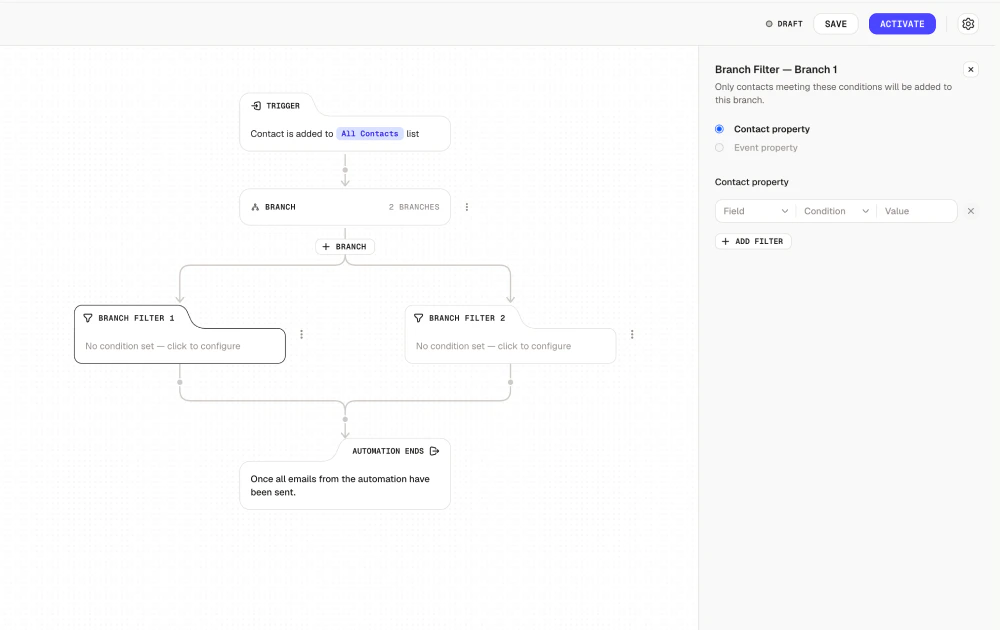
- Contact property - filter on a property stored on the contact record (default).
- Event property - filter on a property from the event that started the automation. Only available when the automation’s entry trigger is Event Received.
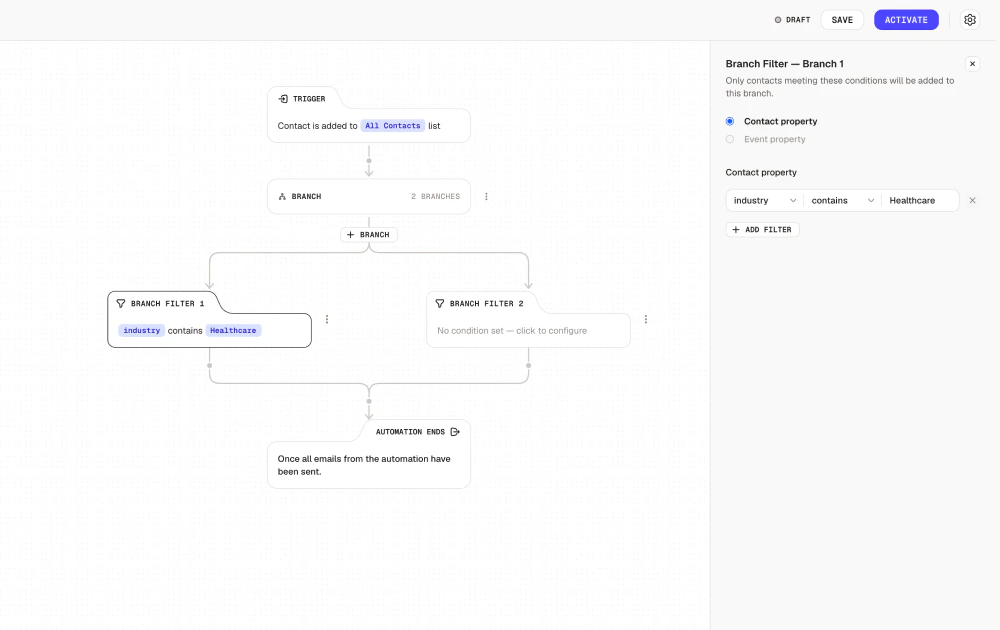
Contact property
Select Contact property, then set the field, condition, and value.- Branch Filter 1:
industrycontainsHealthcare - Branch Filter 2:
industrycontainsFinance
- AND - contact must match all conditions
- OR - contact must match at least one condition
Property values are case-sensitive.
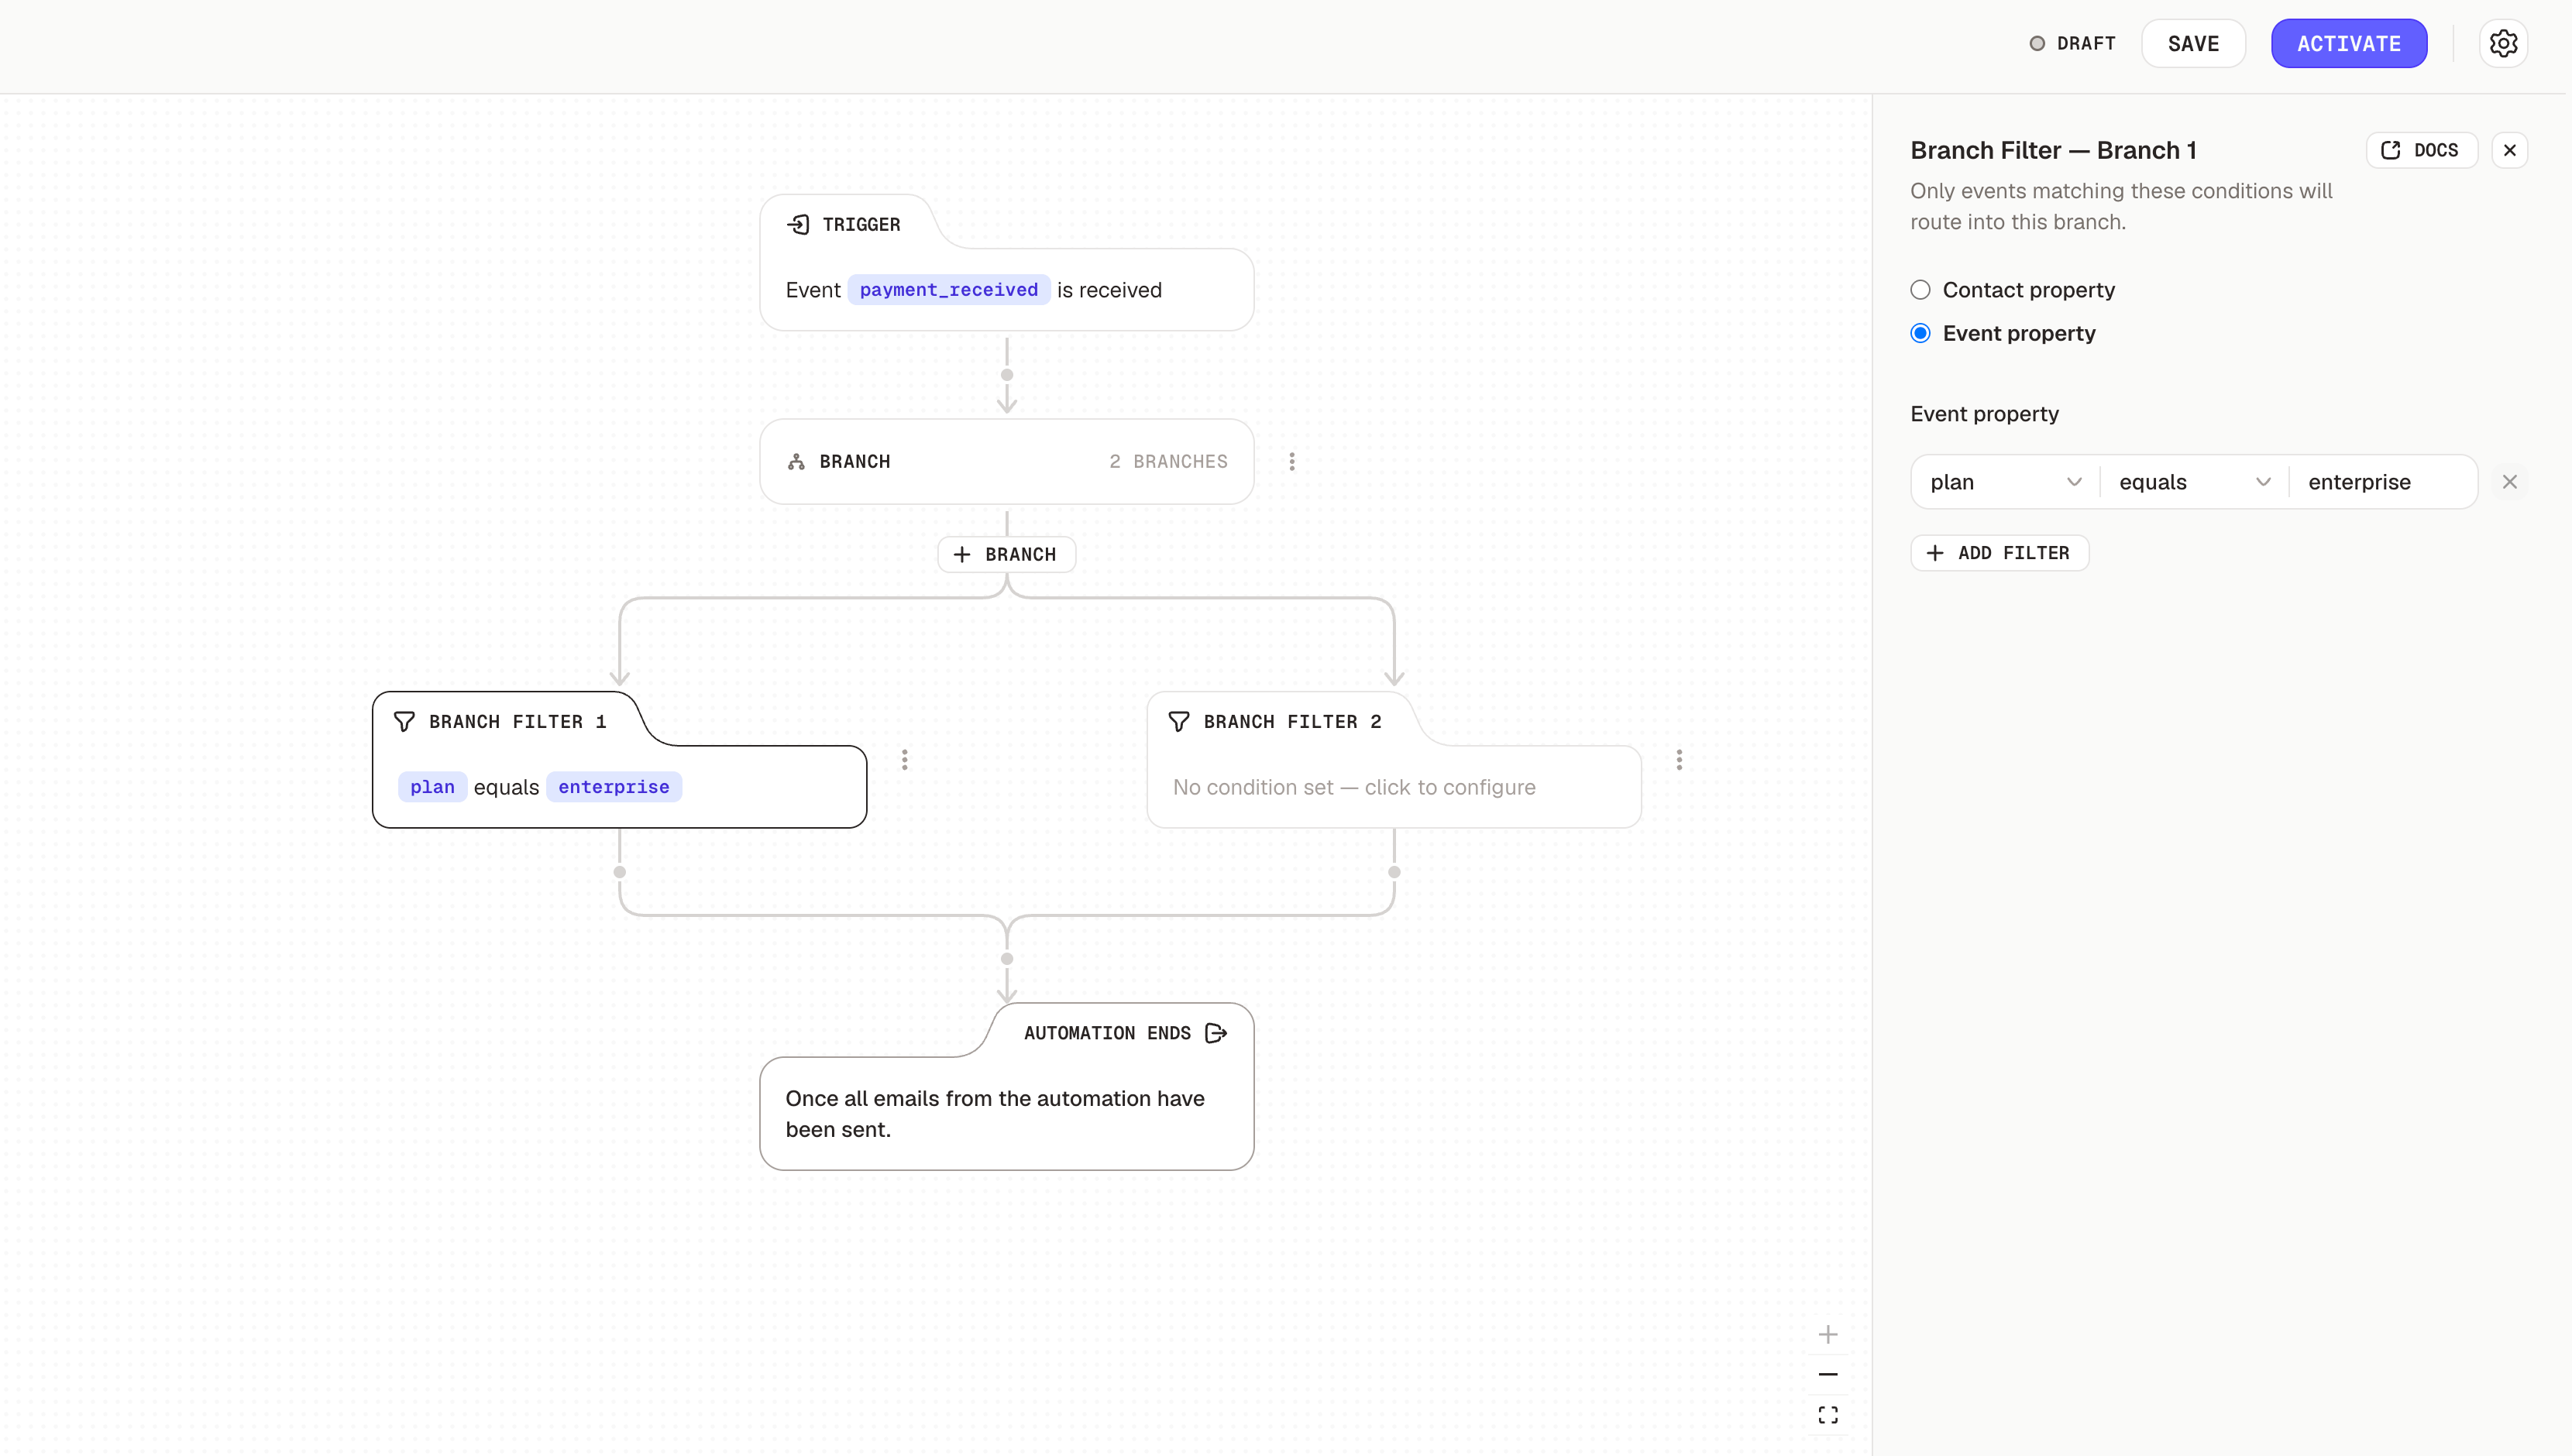
Healthcare and healthcare are treated as different values.Event property
When your automation’s trigger is Event Received, you can branch on the data carried in the event itself instead of the contact record. Select Event property in the filter mode.country, plan, amount) rather than the contact’s custom fields. Operators and value inputs work the same as for contact properties, and are matched per property type (string, number, date, or boolean).For example, on an automation triggered by order_completed:- Branch Filter 1:
order_totalgreater than100 - Branch Filter 2:
order_totalless than or equal to100
Event property is only enabled when the automation’s entry trigger is Event Received. On other trigger types it appears disabled with a tooltip explaining the requirement.
Switching a lane between Contact property and Event property clears that lane’s existing filter, because the field universes don’t overlap. Set the mode first, then build the filter.
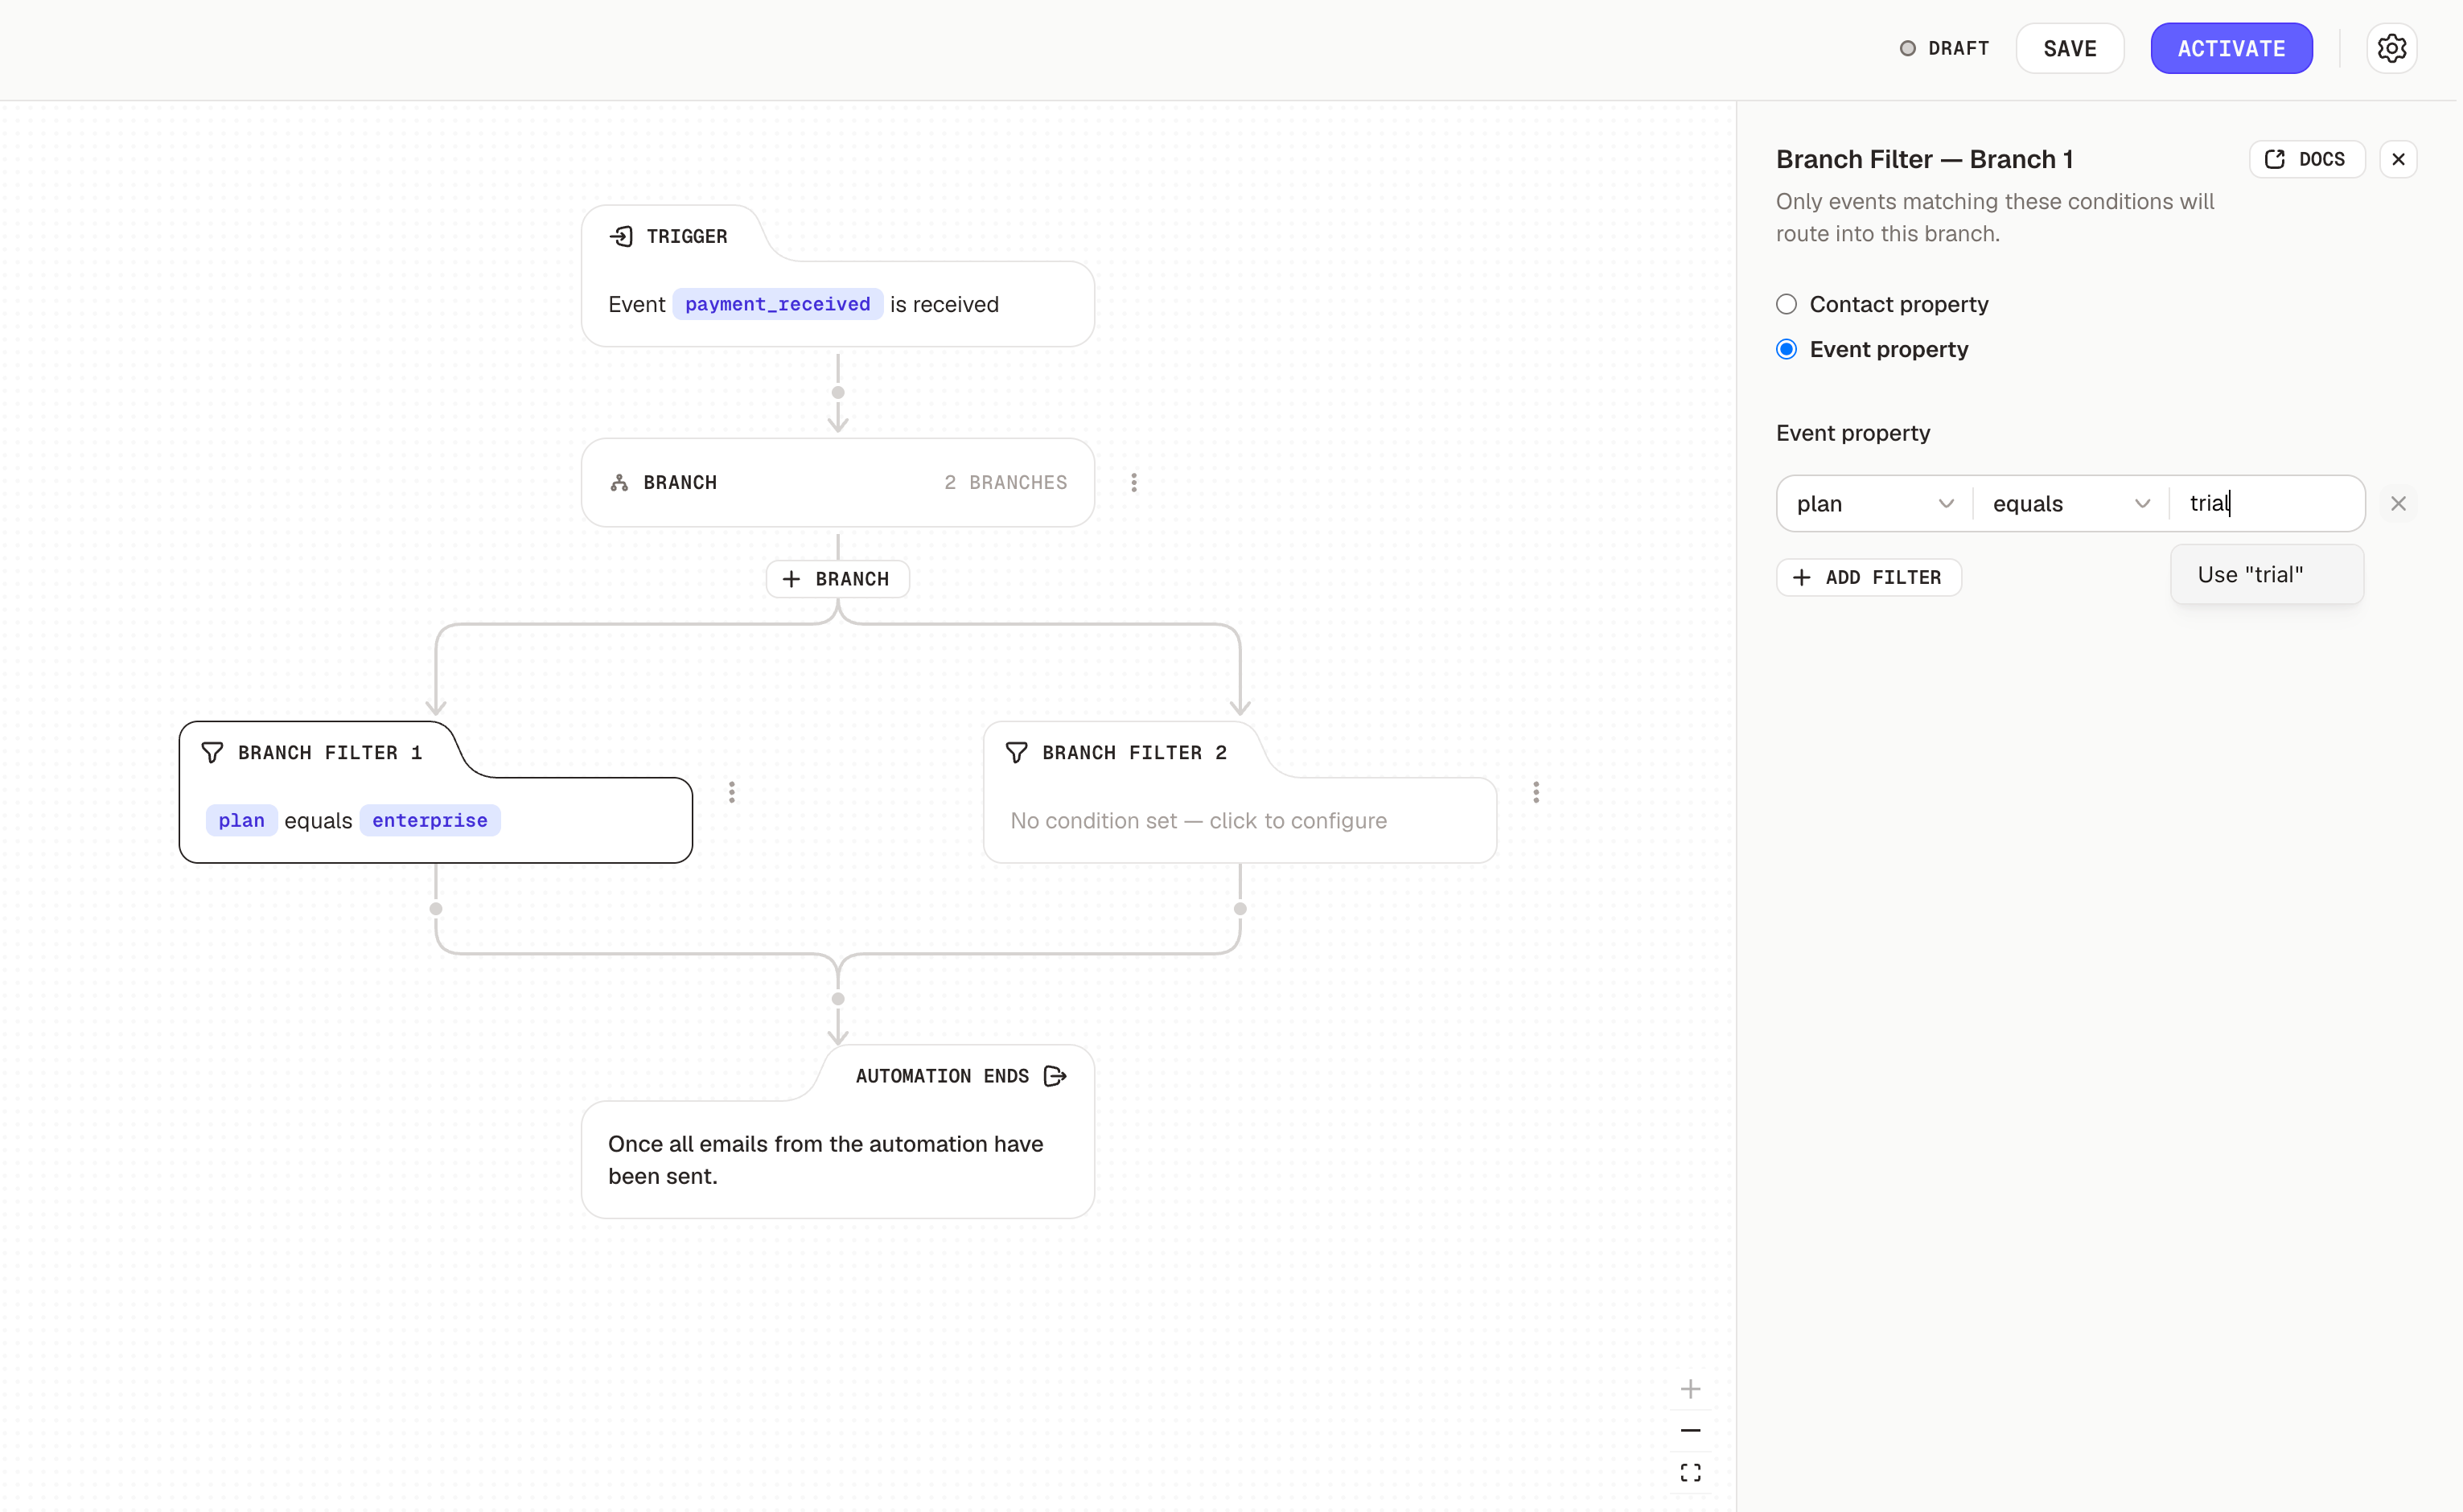
Suggested values for string properties
If you defined suggested values for a string property on the event (see Events), the value input becomes a combobox: pick an existing suggestion from the dropdown, or type a brand-new value and select Use ’…’ to apply it.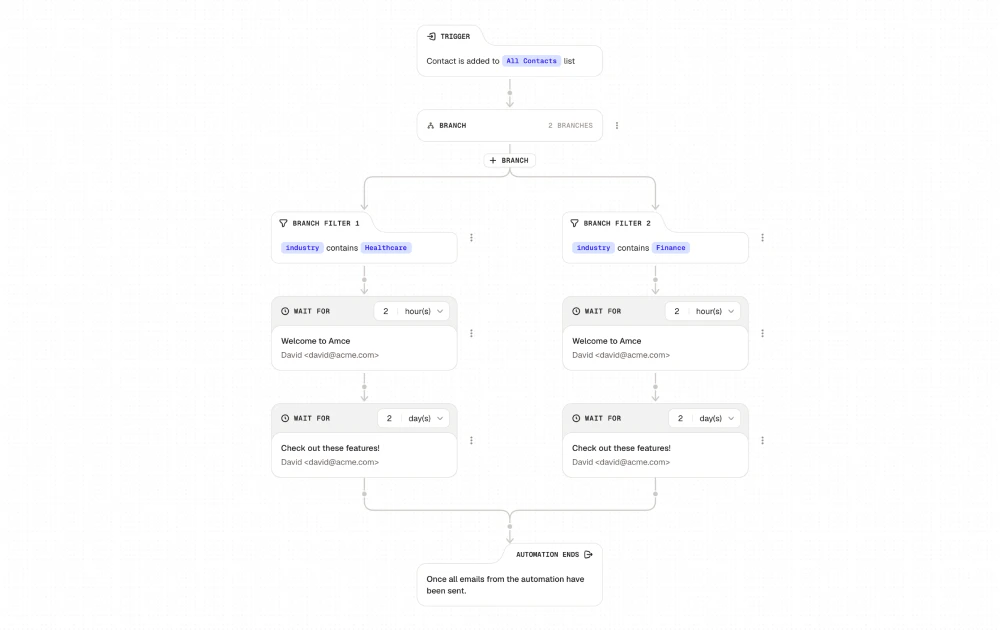
Adding more branches
Click + Branch below the Branch node to add more paths. You can create upto 10 branches in an automation.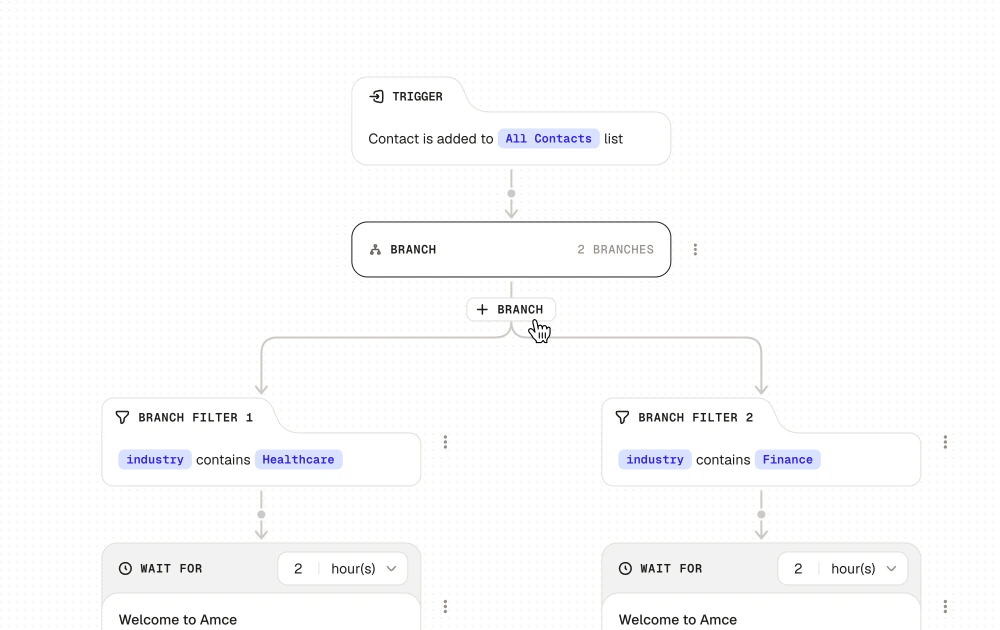
Branches are prioritized from left to right. A contact enters the first branch they match and won’t be checked against any remaining branches after that. If you have multiple branches, make sure to order them with the important conditions first.
Use cases
- Free vs. paid users - Show different features or CTAs based on a contact’s plan
- Role-based content - Send engineers to API guides and marketers to campaign tips based on their
role - Industry-specific emails - Share relevant case studies based on a contact’s
industry - Regional content - Deliver localized messaging based on
region - Onboarding by product - Guide contacts through different setup flows depending on which product they signed up for
- Trial expiry - Send a different automation to contacts whose trial is expiring soon vs. those who still have time left
- Company size - Tailor emails for individual users vs. teams vs. enterprise accounts based on
company_size - Signup source - Follow up differently depending on whether a contact came from a demo, a referral, or organic signup
- Order value (event property) - On an automation triggered by
order_completed, route high-value orders to a VIP thank-you and lower-value orders to a standard receipt sequence - Plan picked at signup (event property) - On a
signup_completedevent carrying aplanproperty, send each plan into its own onboarding