email.received webhook carrying the message metadata (message ID, sender, recipients, subject, receiving domain, and threading). Your application then calls a structured REST endpoint with that message ID to fetch the full message, including headers, plain text and HTML bodies, attachments, and verdicts. Use it to build support inboxes, parse customer replies, route email into internal tools, or store conversations alongside the rest of your data.
Jump straight to the Inbound Emails API reference
for endpoints, request schemas, and response samples.
How the Inbound Email API works
Subscribe to the email.received event
Create a new webhook or reuse an existing one, and subscribe it to the
email.received event. You can set this up from the Webhooks section of the dashboard. See the Webhooks introduction if you need a refresher on creating endpoints.Receive an inbound notification
When an email arrives on one of your receiving domains, AutoSend delivers an
email.received webhook to your endpoint. The payload includes the message ID, sender, recipient, subject, receiving domain, and threading metadata. See the full payload in the event types reference.Fetch the full message via API
Use the message ID from the webhook payload to fetch the complete structured JSON, including headers, text and HTML bodies, attachments metadata, and verdicts, via the Get Message endpoint.
Receiving domains
Every project comes with a default receiving domain. You can also enable Inbound on a custom domain if you need email to arrive at an address you control.Default receiving domain
Each project is provisioned with a unique receiving subdomain in the form{prefix}@{uniquesubdomain}.autosend.email. You pick any prefix and immediately start receiving email at that address. No DNS setup is required.
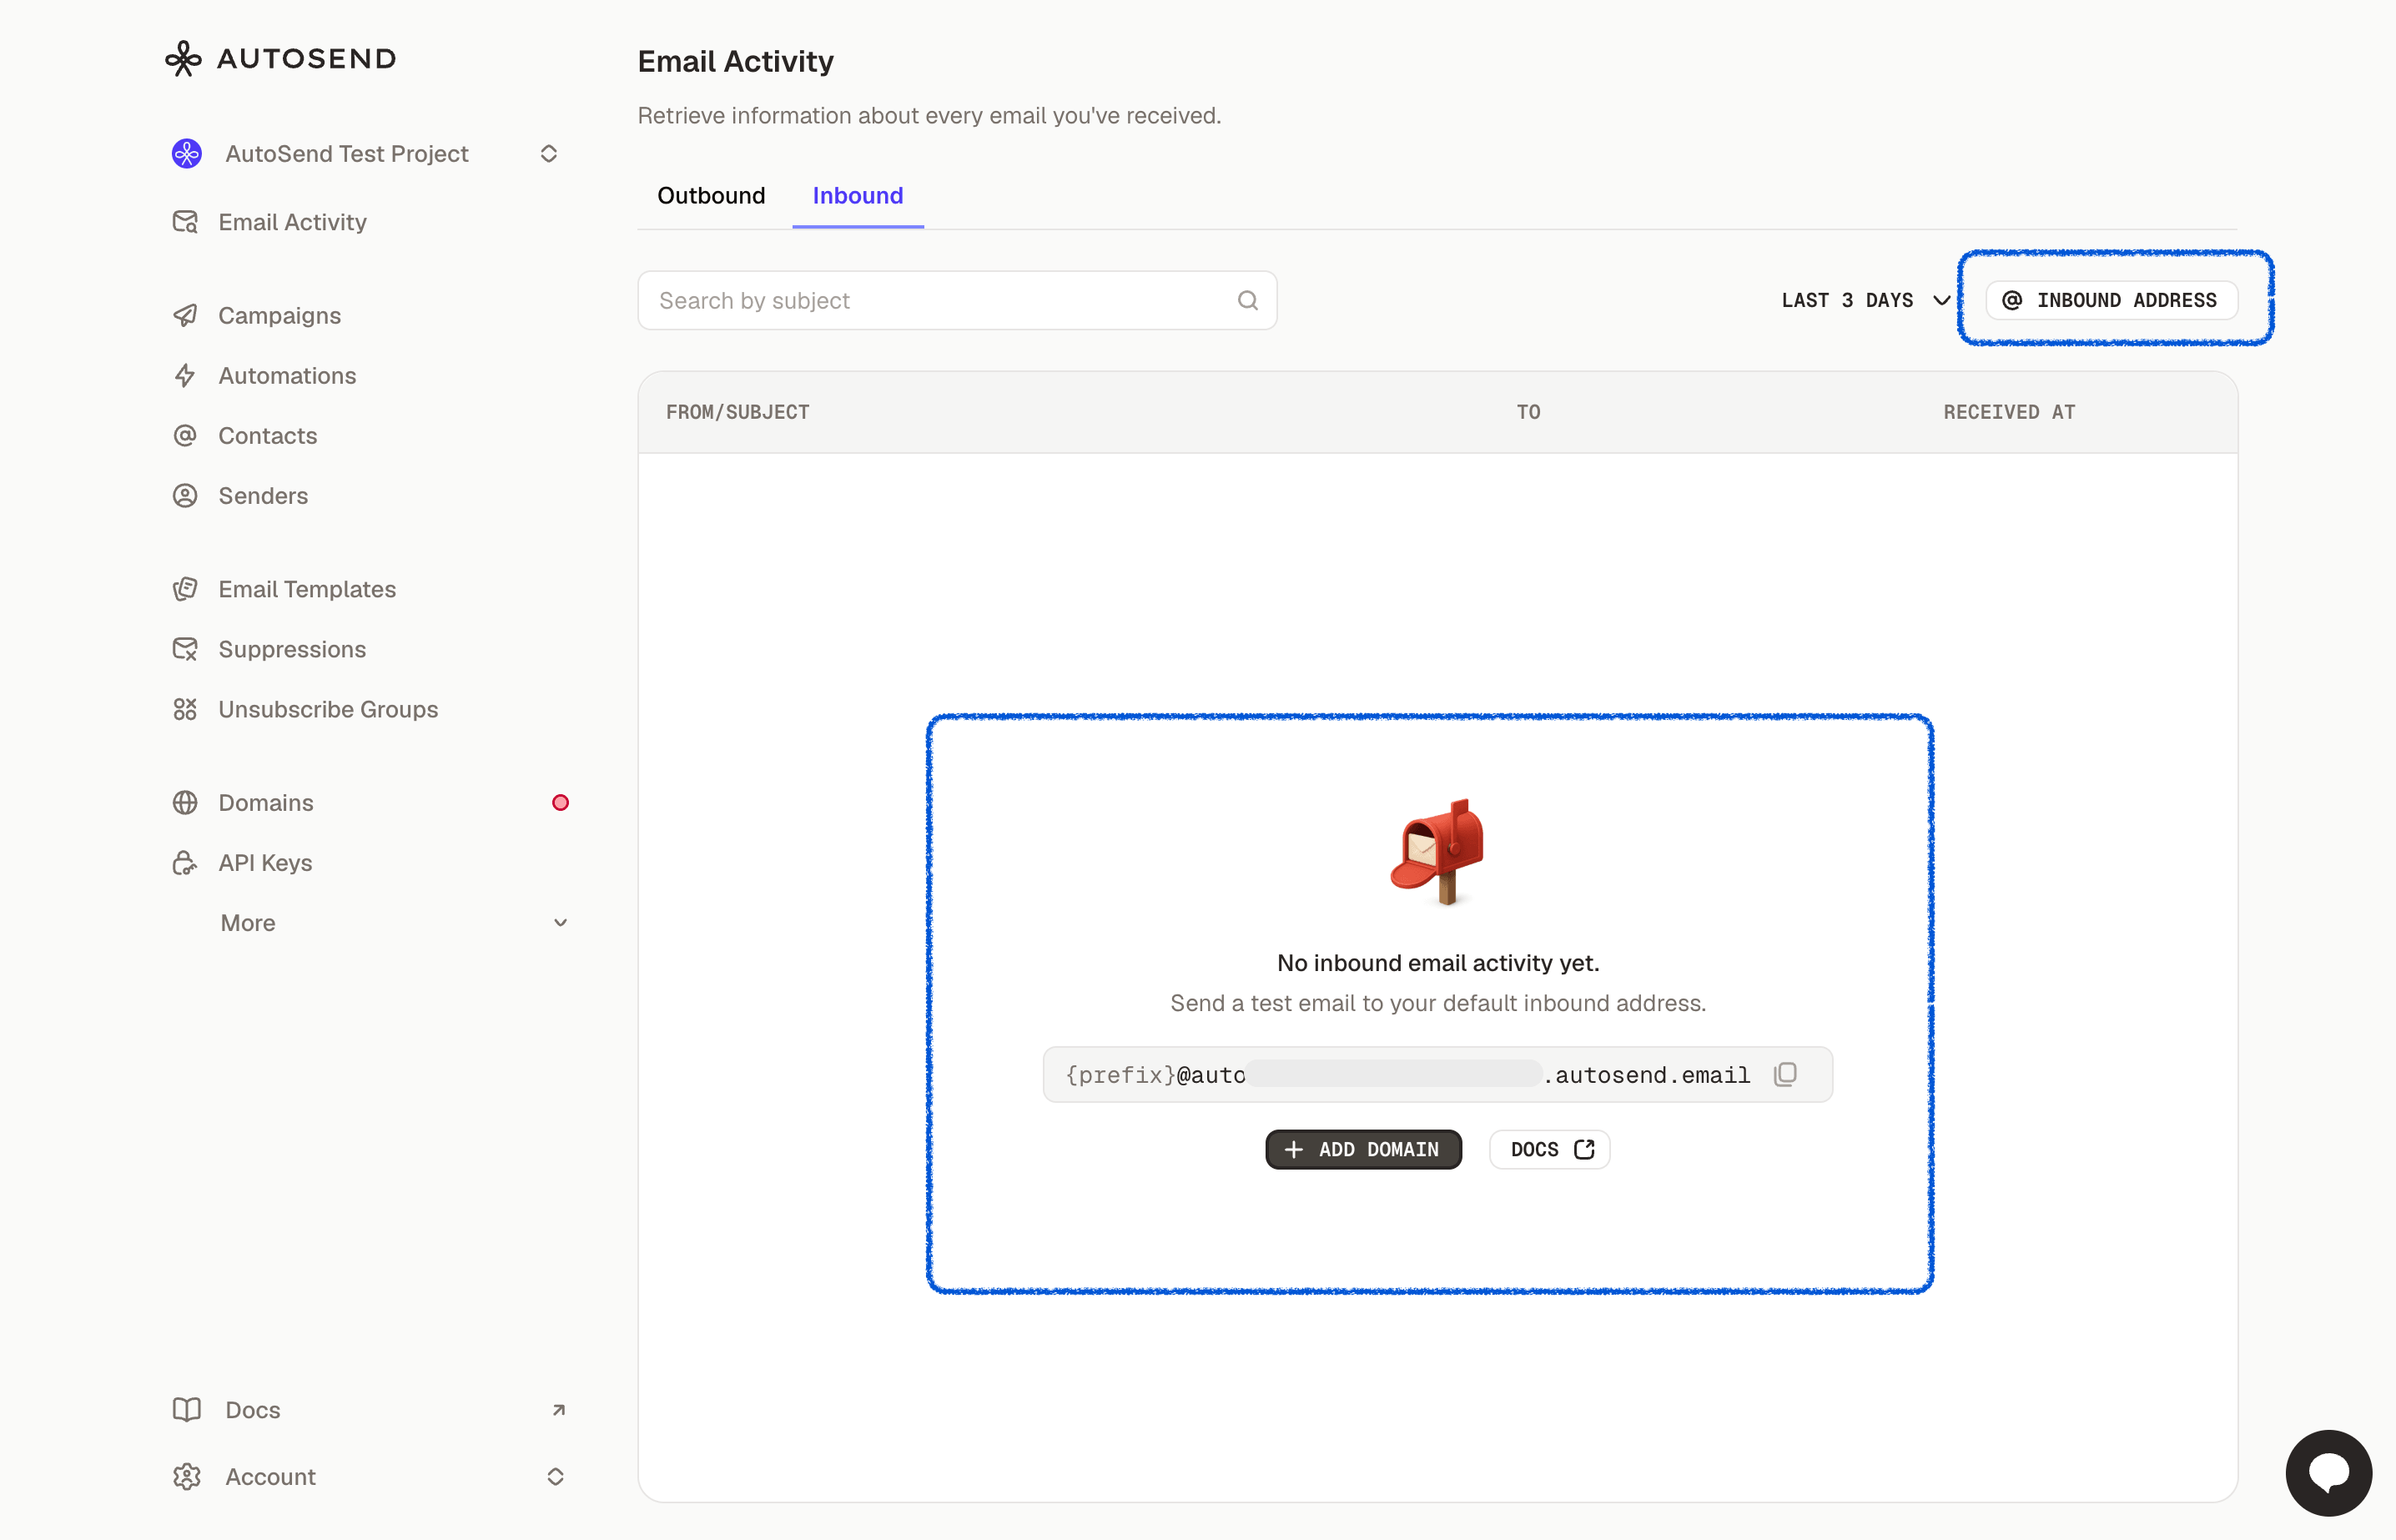
Use your own domain
You can also enable Inbound on a domain you’ve already verified for sending on AutoSend, or add a brand-new domain. Follow the MX record instructions shown in the dashboard to point incoming mail to AutoSend.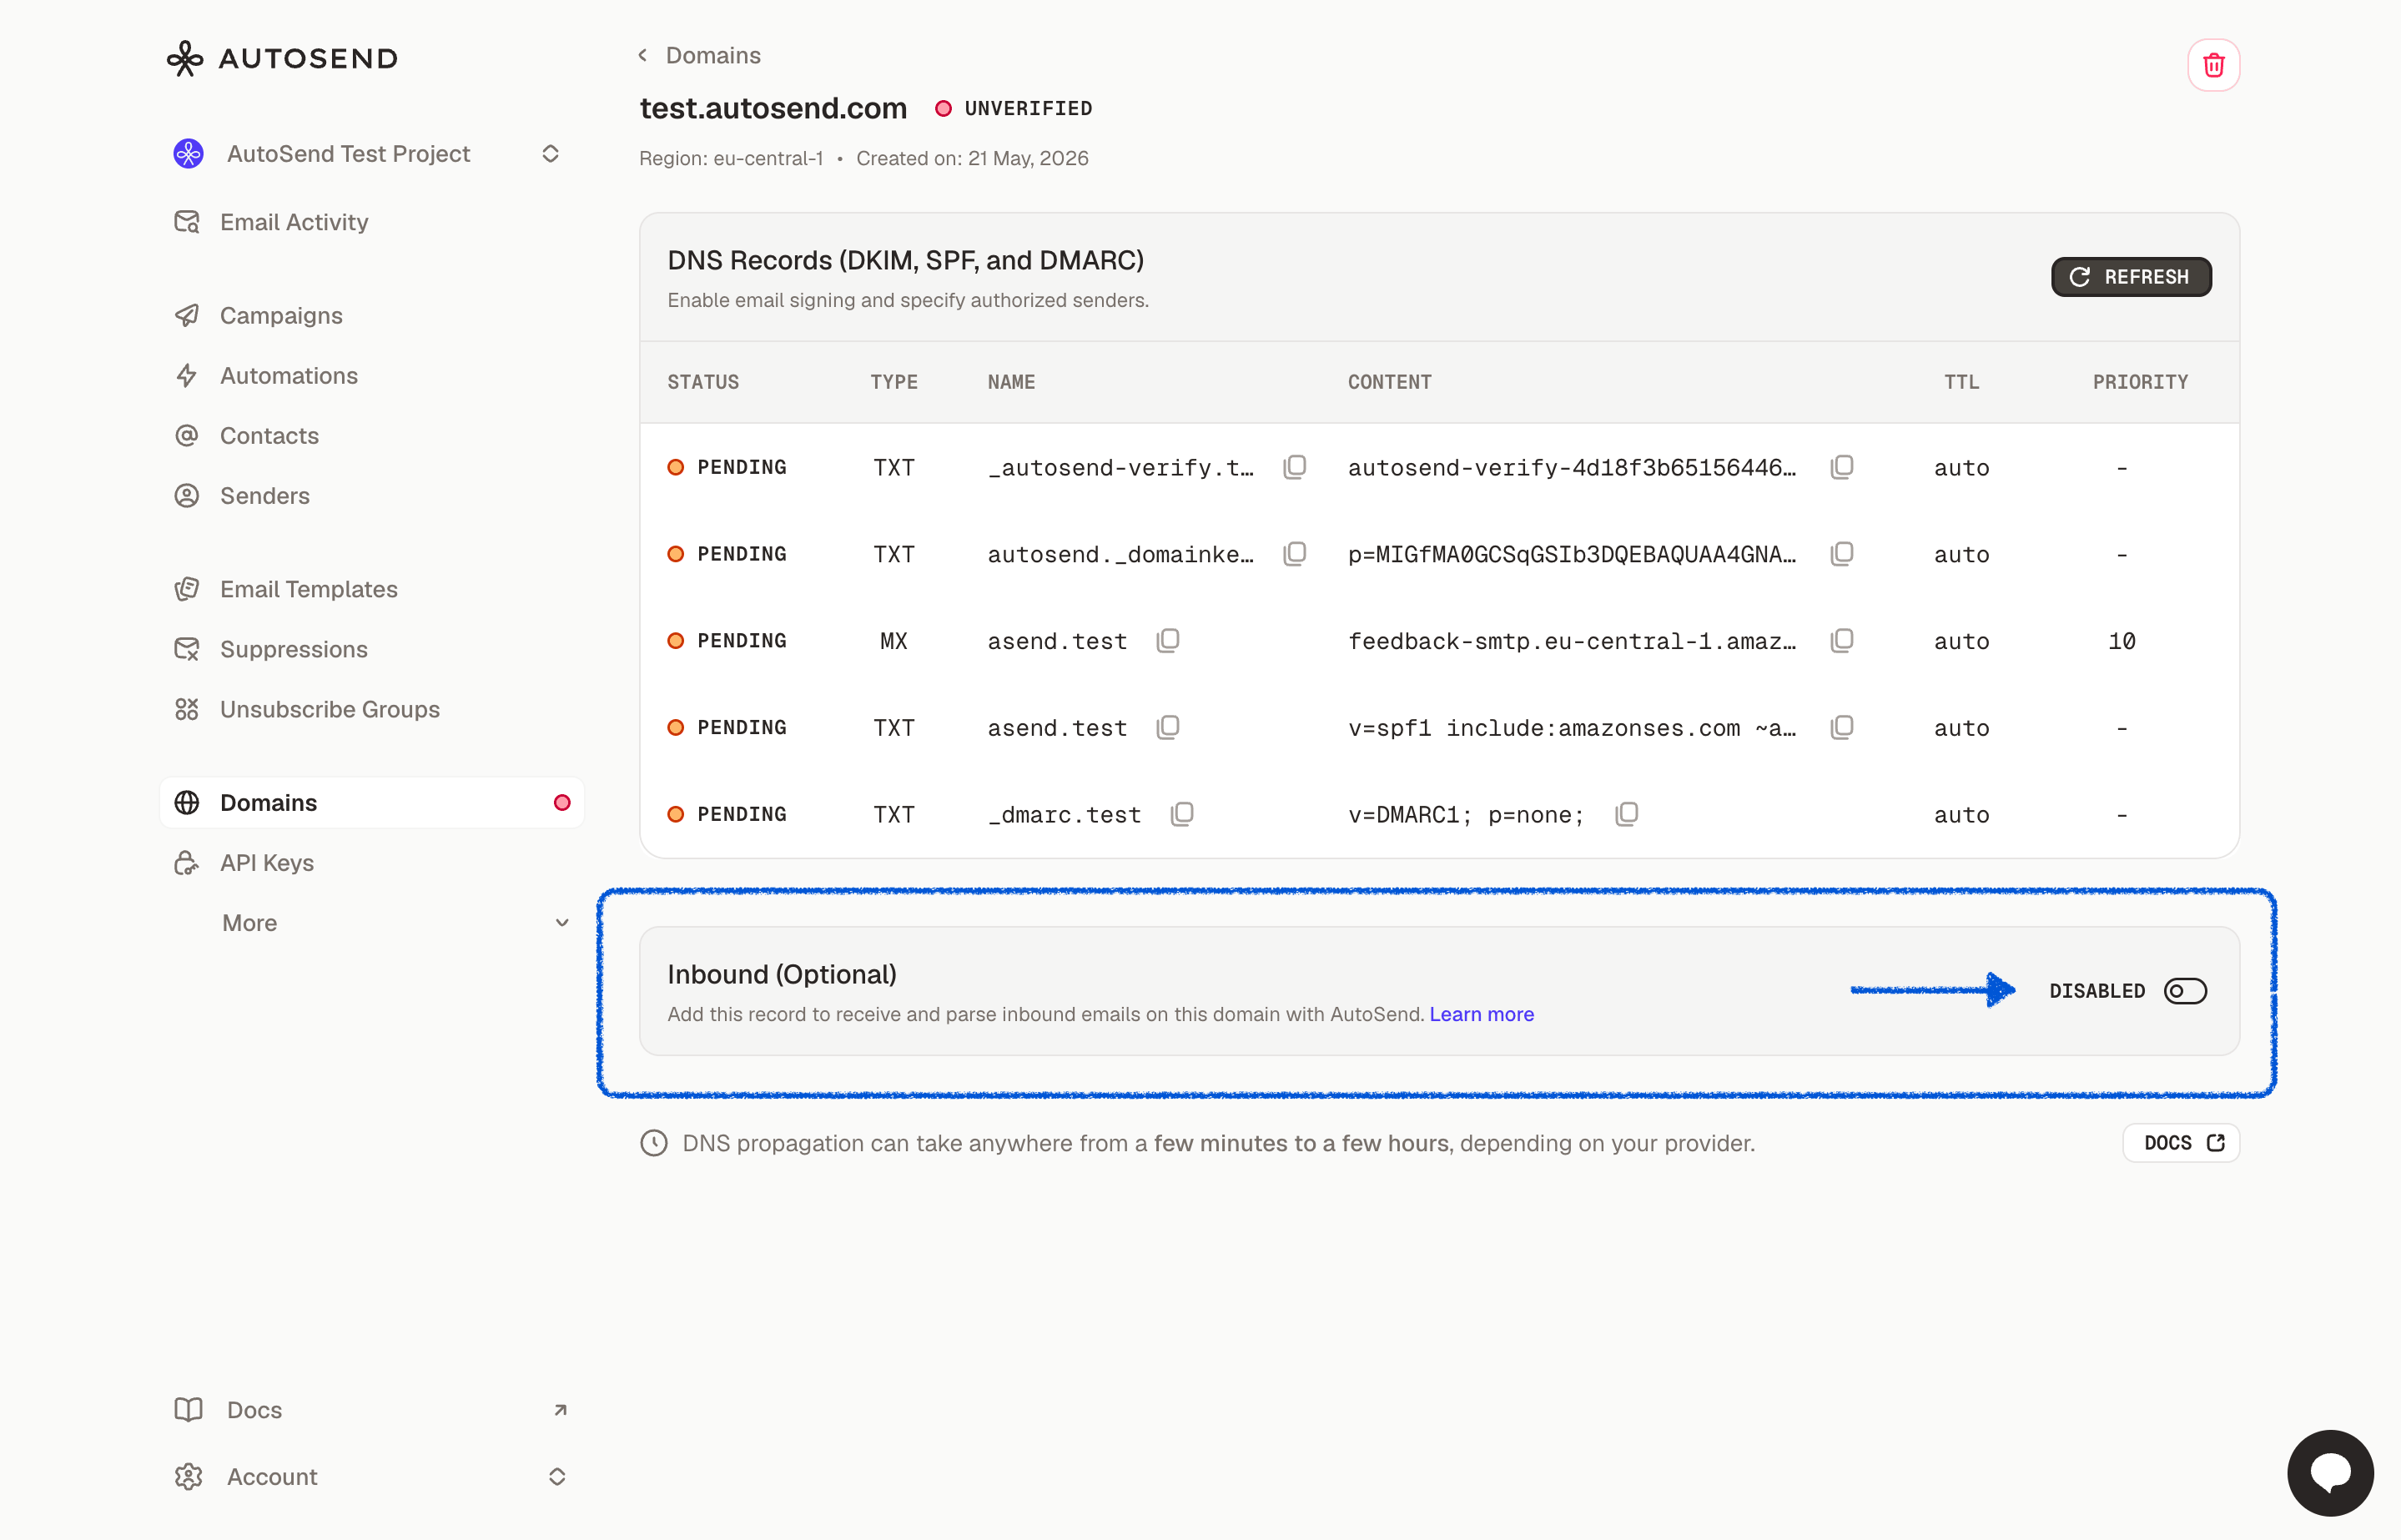
Reading and replying to messages
Once anemail.received webhook fires, you can use the Inbound Emails API to read the full message, download attachments, and reply in the same thread.
List messages
Paginate, filter, and search messages received on your project’s inbound-enabled domains.
Get a message
Fetch a single message with full body, headers, attachments metadata, and threading.
Download attachment
Download a single attachment by its zero-based index.
Reply to a message
Send a threaded reply via In-Reply-To and References headers using a verified sending domain.
Common use cases
- AI agent inbox: Pair Inbound with the AutoSend sending API to give your AI agents a fully two-way email address. Your agents can both send outbound messages and receive replies in the same project, enabling real email conversations driven by an LLM.
- Support portal or helpdesk: Route customer replies into your ticketing system and let agents respond from a unified inbox.
- CRM email logging: Capture incoming emails as activities on the matching contact, lead, or deal record.
- Applicant tracking system (ATS): Parse candidate replies to recruiting outreach and attach them to the right pipeline stage.
- Custom email client or inbox: Build a fully featured mailbox without running your own mail server, MX records, or IMAP plumbing.
Frequently asked questions
Can I receive emails using an API?
Can I receive emails using an API?
Yes. The AutoSend Inbound Email API delivers incoming messages to your application in two steps.
First, an
email.received webhook notifies you when a new email arrives on one of your
receiving domains. Second, a REST endpoint returns the full structured message, including
headers, plain text and HTML bodies, attachments, and threading metadata.Which AutoSend plan do I need to use the Inbound Email API?
Which AutoSend plan do I need to use the Inbound Email API?
The Inbound Email API is available on the Starter 10k plan and above. Free and trial plans
do not include inbound receiving. Upgrade your project from the Billing page to enable it.
How do I receive incoming emails on AutoSend?
How do I receive incoming emails on AutoSend?
Pick or enable a receiving domain in the dashboard, create a webhook subscribed to the
email.received event, and call the Get Message
endpoint with the message ID from the webhook payload to fetch the full email.Do I need a custom domain to use the Inbound Email API?
Do I need a custom domain to use the Inbound Email API?
No. Every project is provisioned with a default receiving domain in the form
{prefix}@ {uniquesubdomain}.autosend.email and you can start receiving email immediately without any DNS
setup. You can also enable Inbound on a verified custom domain when you need email to arrive at
an address you control.Can I reply to inbound emails through the API?
Can I reply to inbound emails through the API?
Yes. Use the Reply to Message endpoint to send
a threaded reply. AutoSend sets the
In-Reply-To and References headers automatically so the
reply lands in the same conversation in the recipient’s inbox.How do I parse attachments from an inbound email?
How do I parse attachments from an inbound email?
The Get Message response includes attachment
metadata for every message. Download the binary content of a specific attachment by its
zero-based index via the
Download Attachment endpoint.
Related resources
email.received event
Full webhook payload reference for inbound notifications.
Webhooks introduction
Set up a webhook endpoint and verify requests.
Manage Inbound
Configure receiving domains and view incoming messages in the dashboard.
Domains
Verify a domain or add a new one to use with Inbound.