


Prerequisites
Verified Domain
Make sure you have a verified domain added in AutoSend to send emails from.
API Key
Create a new API key for the Custom Action or use an existing one.
Configuration
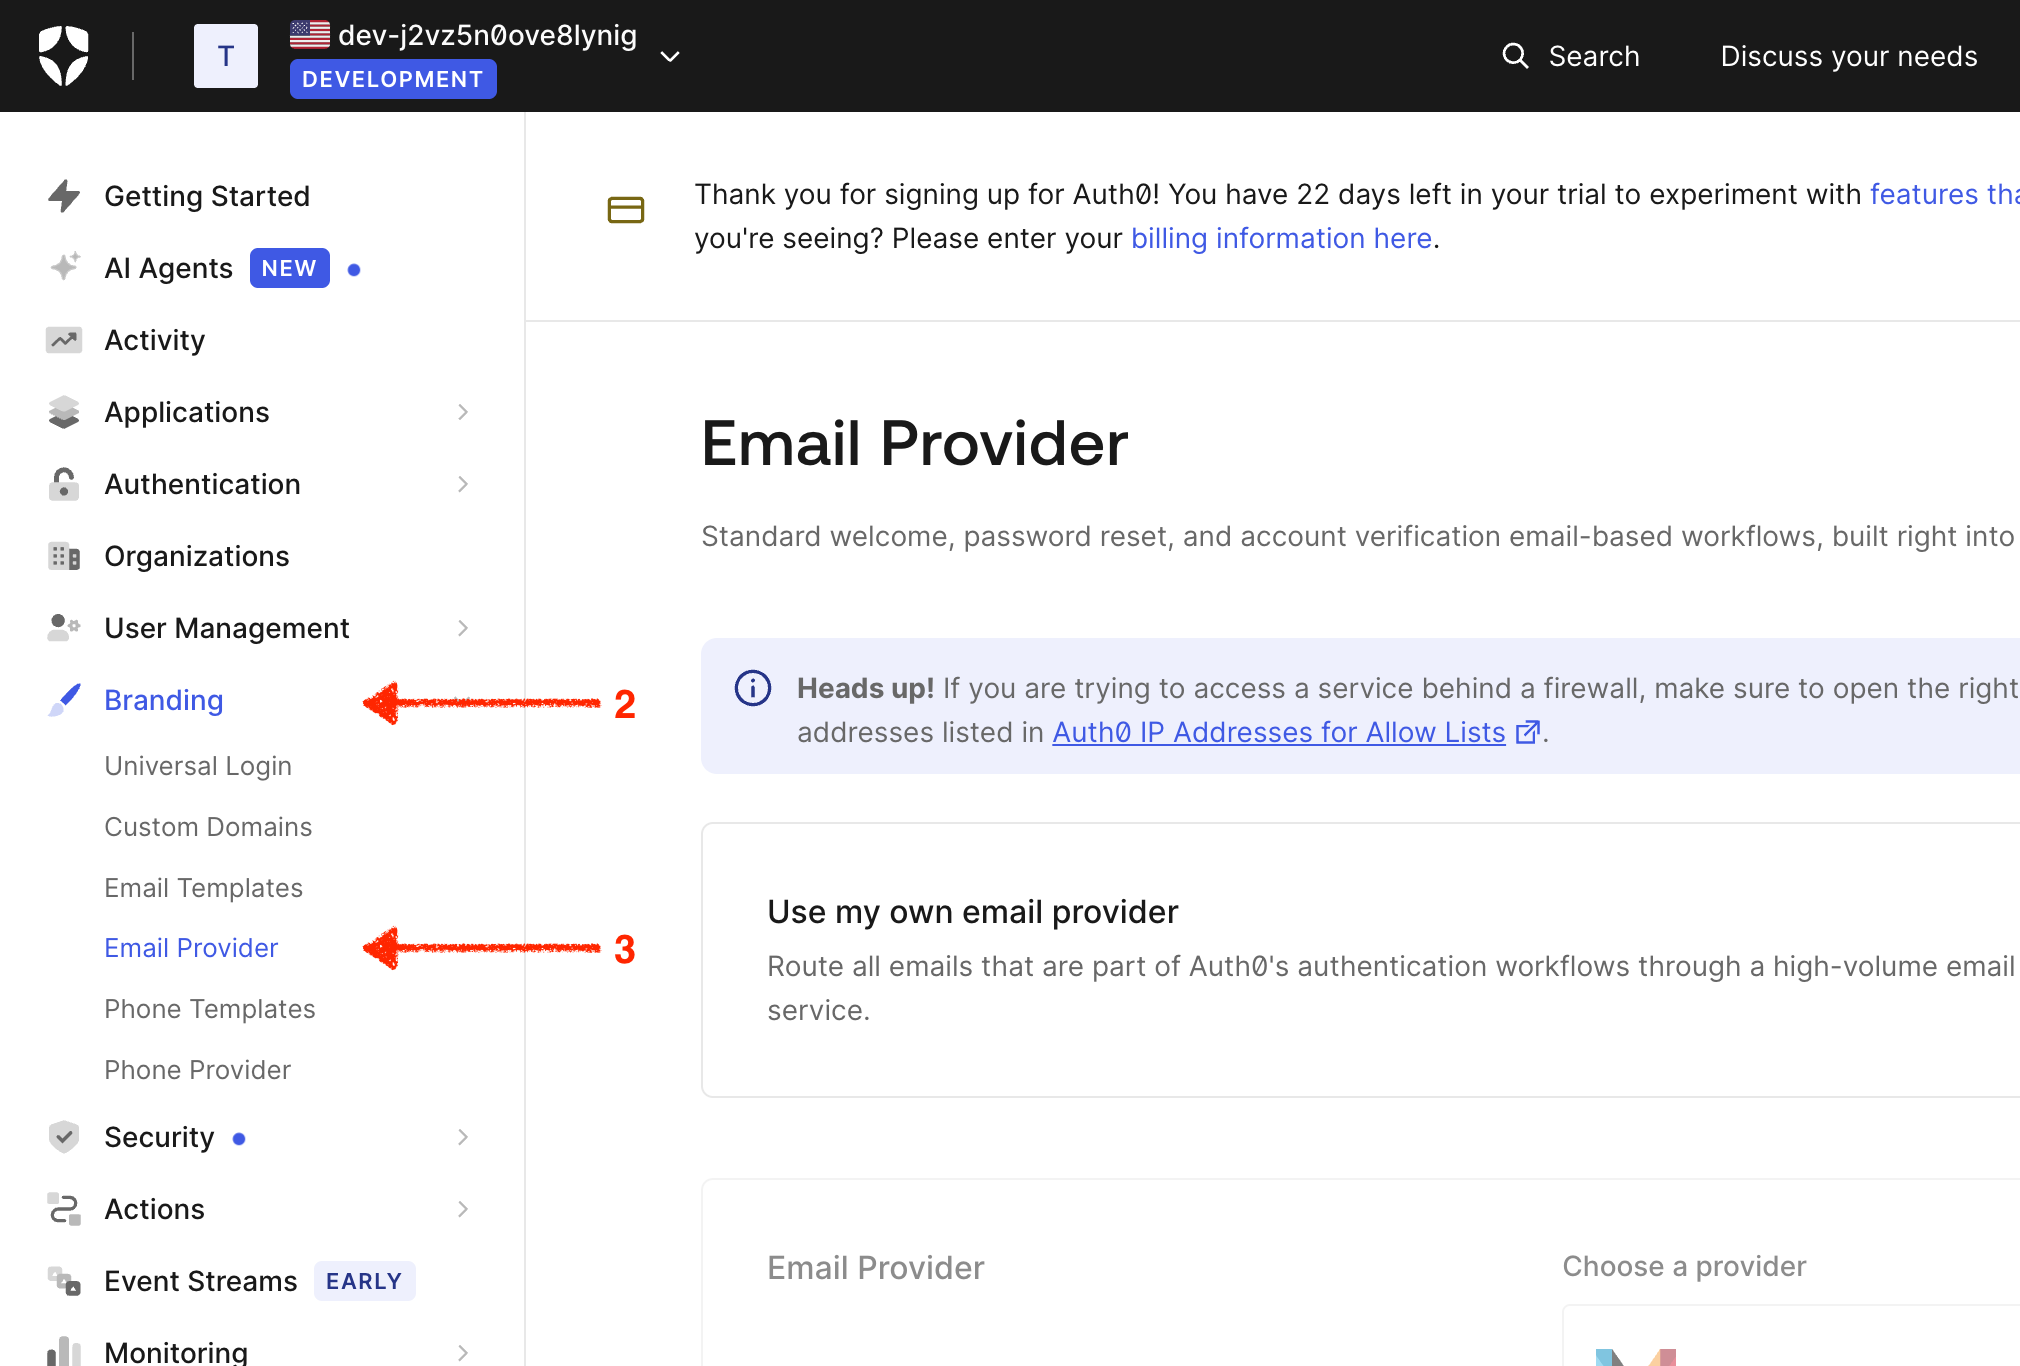
Navigate to Email Provider Settings
- Log in to your Auth0 Dashboard
- Go to Branding in the sidebar
- Click on Email Provider
Enable Custom Email Provider
Toggle Use my own email provider to enable the custom provider configuration.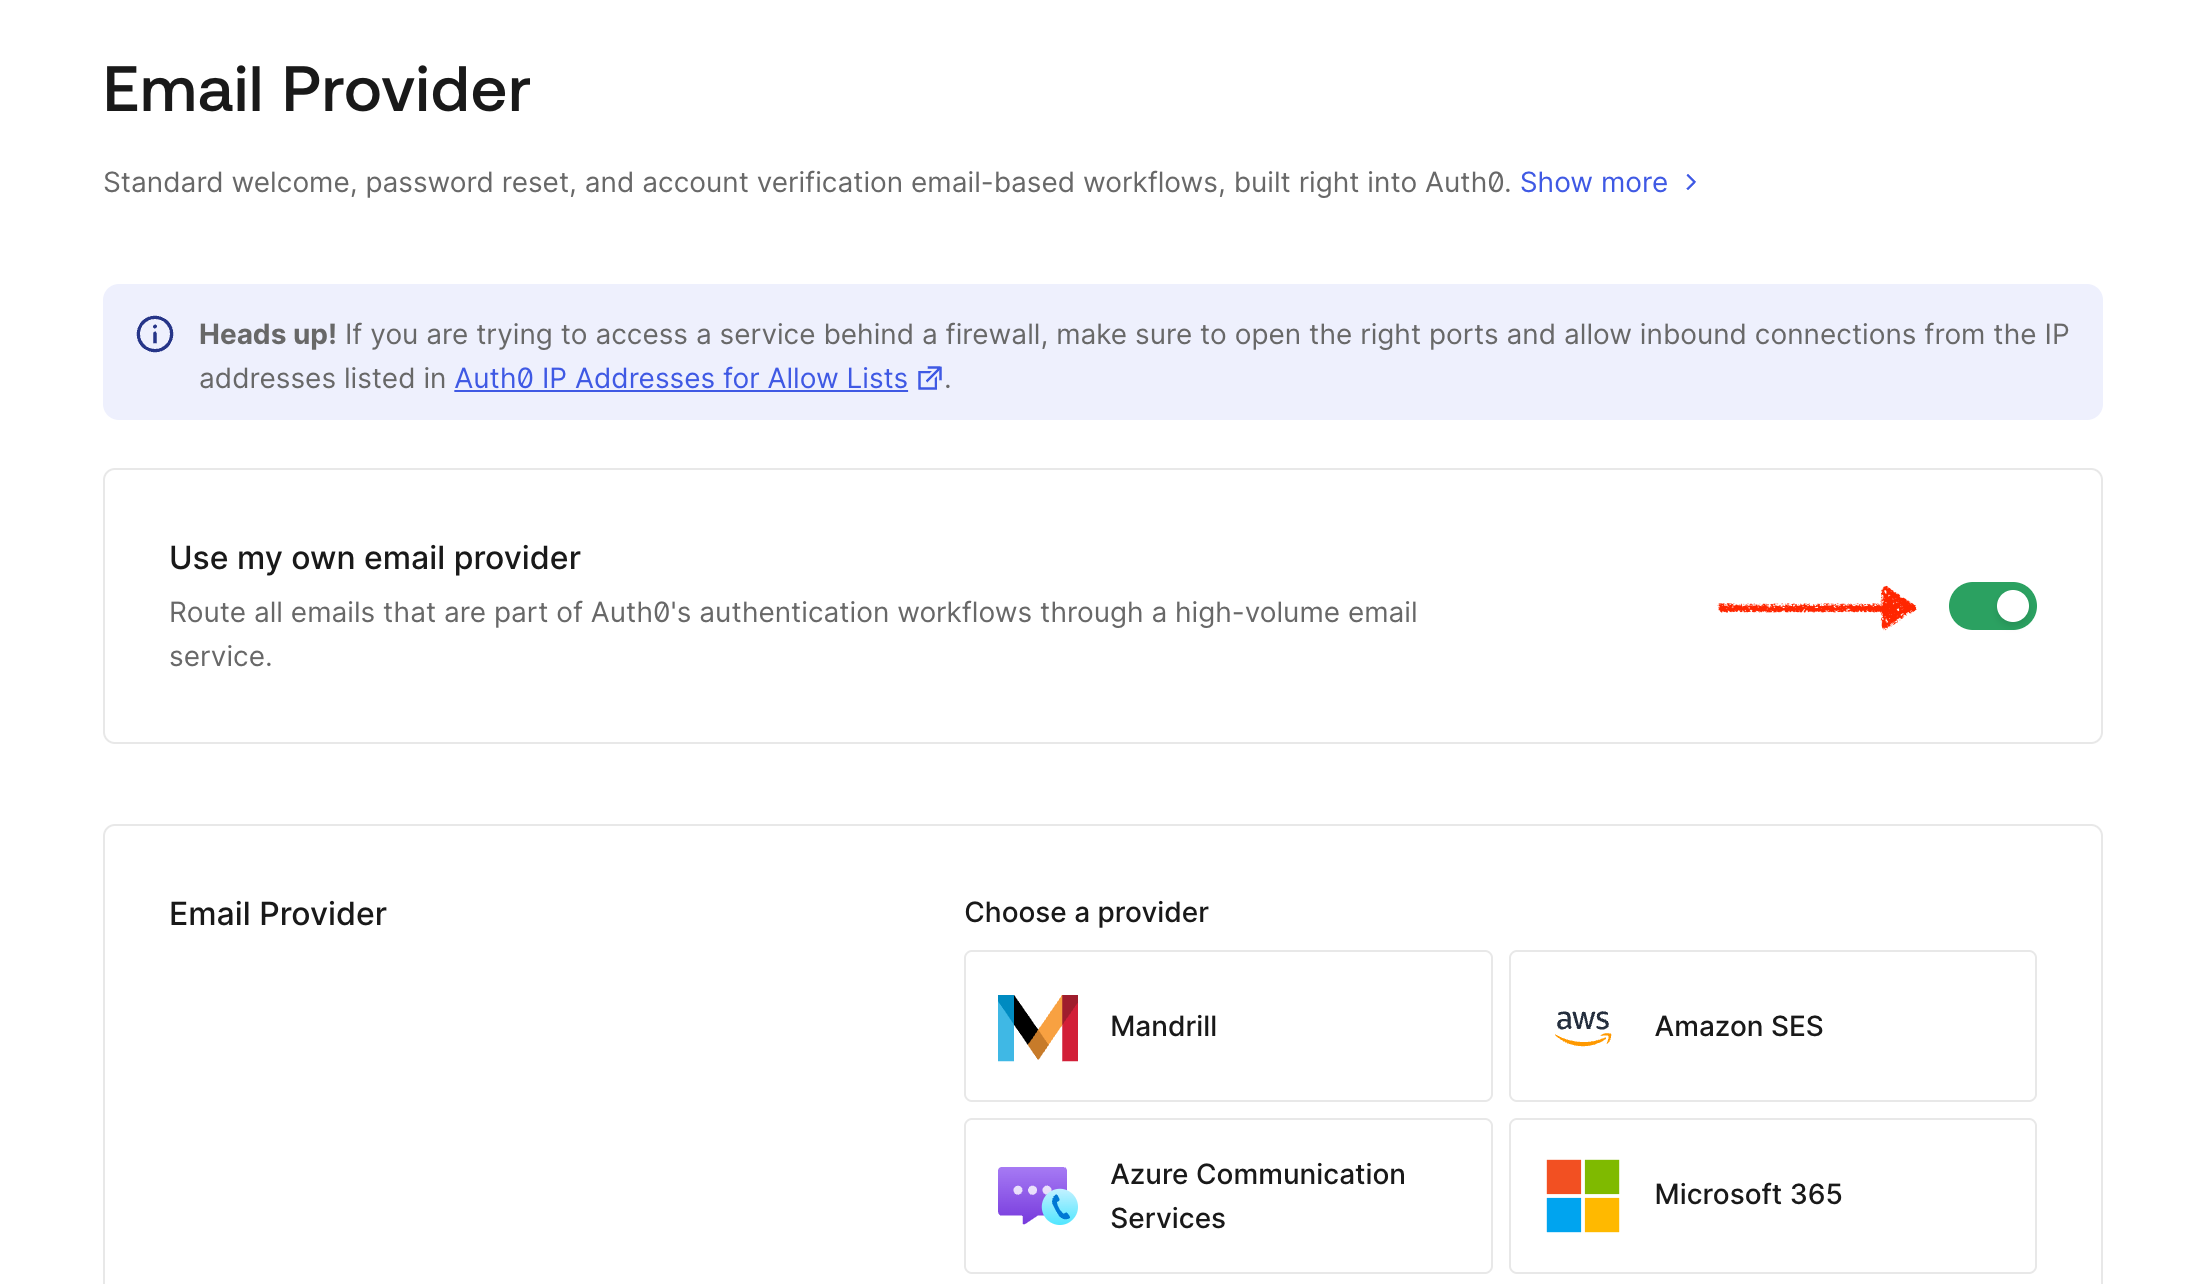
Select Custom Action Provider
Select Custom Provider as your email provider type. Auth0 will create a Custom Email Provider Action that runs every time an authentication email needs to be sent.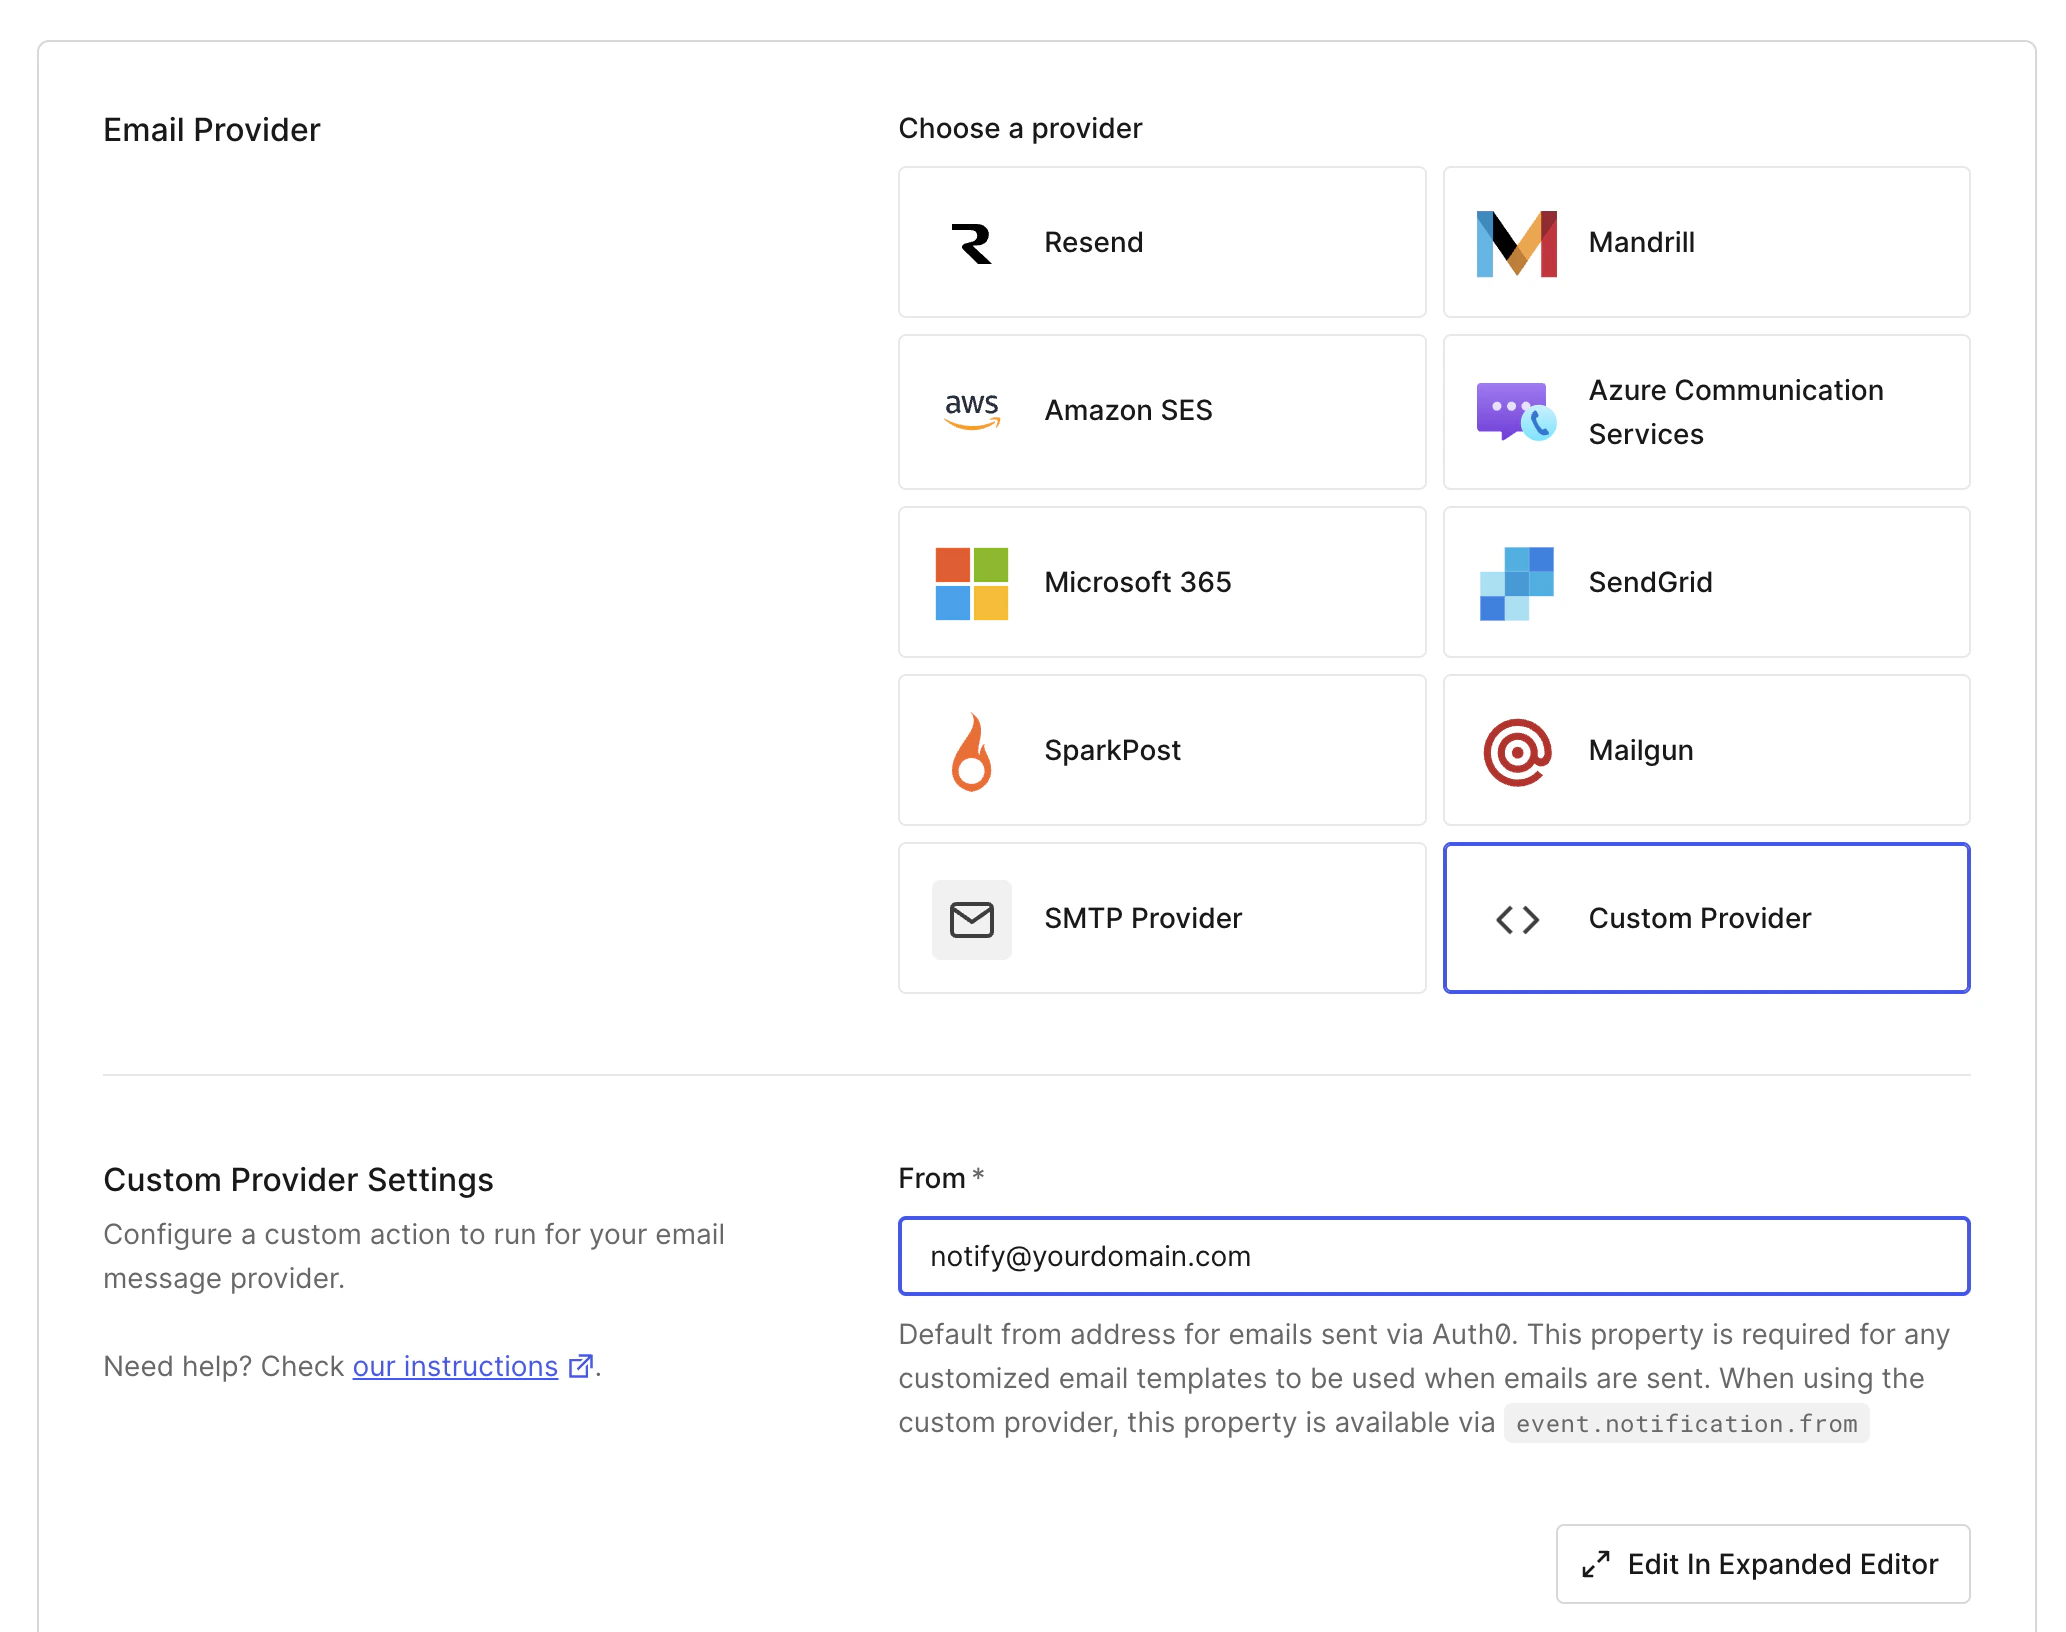
Add the AutoSend Action Code
Replace the default action code with the snippet below. It forwards every Auth0 notification to the AutoSend Send Mail API.You’ll need an AutoSend API key for the next step. Create one from the API Keys page in your dashboard, or follow the API reference for details on authentication.
Auth0 Custom Email Provider Action
Update the
from.email to an address on your verified domain as a falls back to notification.from value which is sent by Auth0.Add the AutoSend API Key as a Secret
In the Action editor, you can click the key icon to add secrets on the left panel and add a new secret named 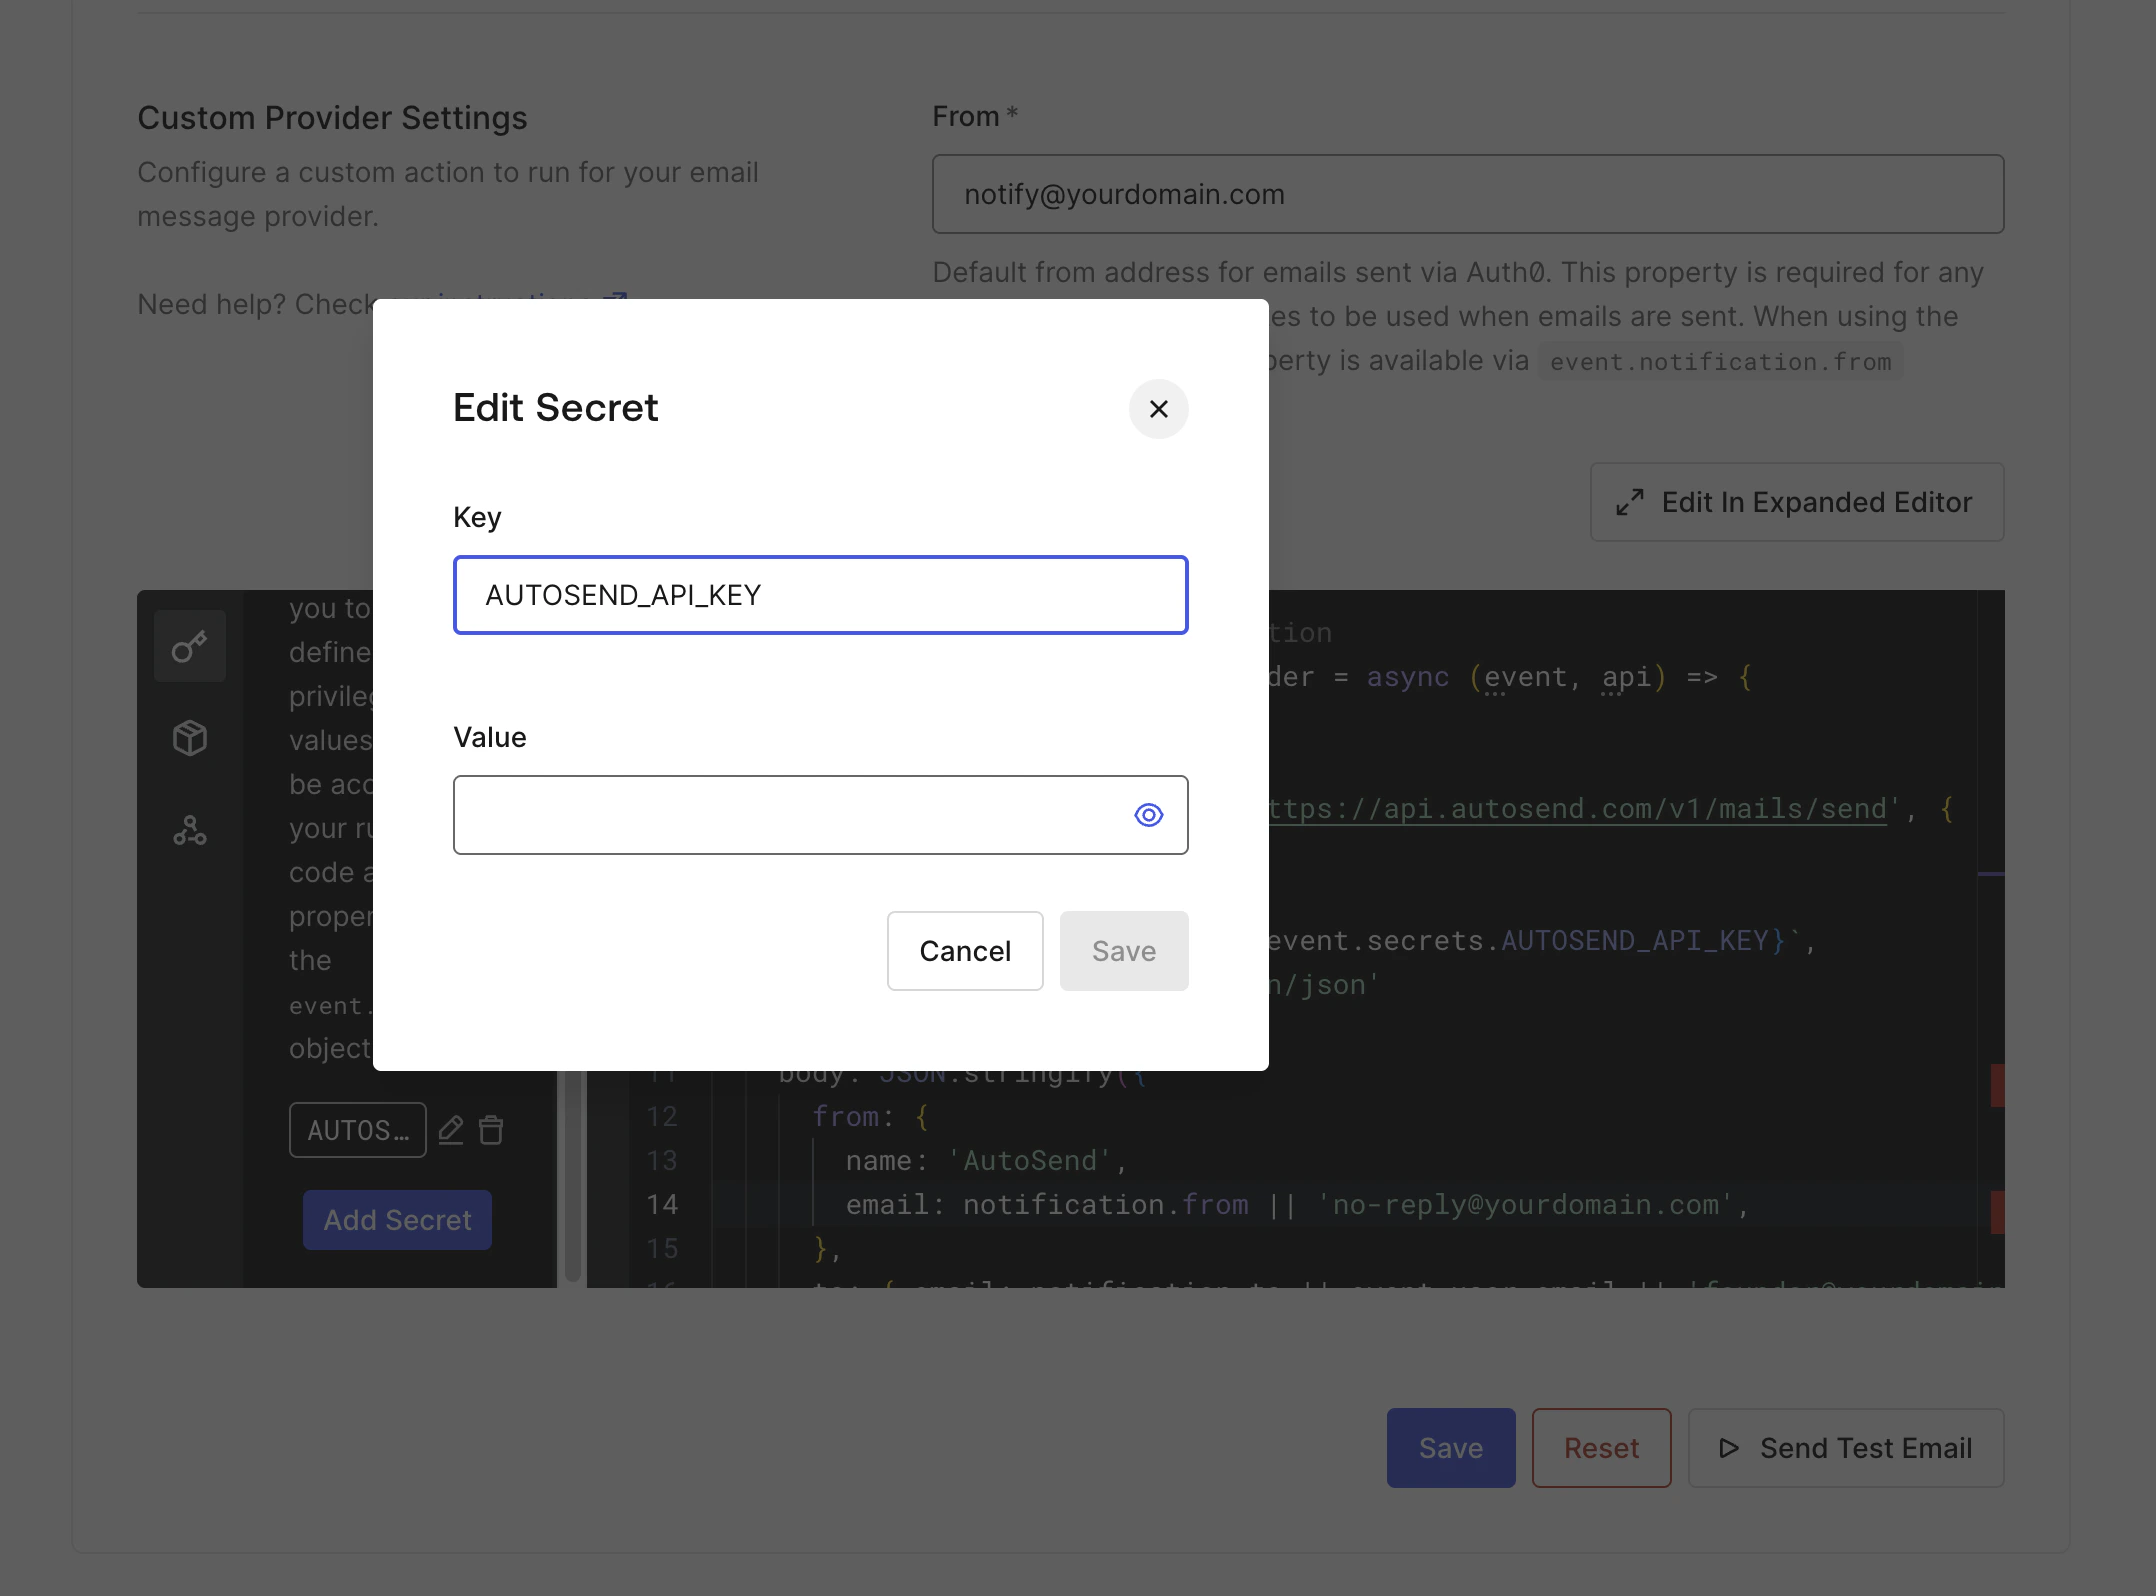
AUTOSEND_API_KEY with your AutoSend API key (AS_xxx) as the value. The action reads it via event.secrets.AUTOSEND_API_KEY.Deploy the Action
Click Deploy/Save in the top right of the Action editor to publish your changes. Auth0 will start routing authentication emails through the action immediately.
Send a Test Email
After saving, click the Send Test Email button next to the Save button to send a test email and verify your configuration is working.The test email is delivered to the address in the last field of the 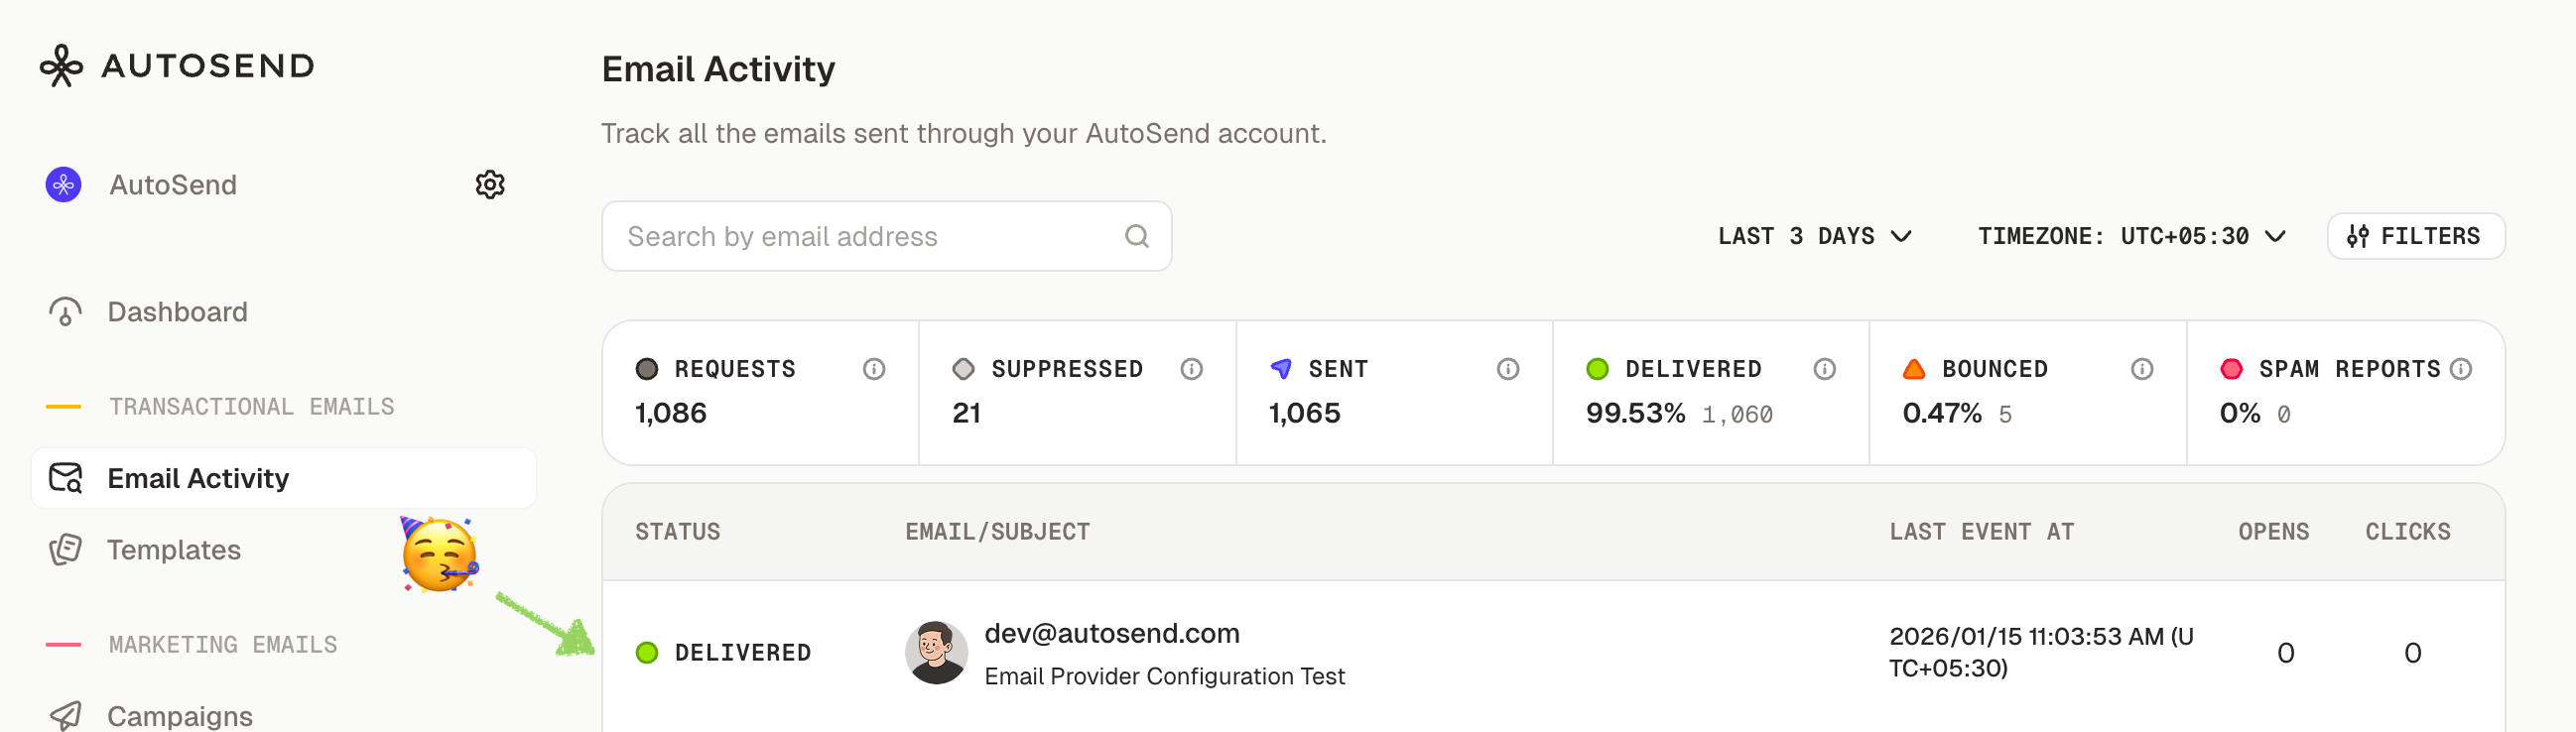
to json object '[email protected]'. The other fields (notification.from, notification.subject, etc.) are populated by Auth0 with sample values; only the recipient address controls where the message lands.You can also check the Email Activity dashboard to verify the email was sent through AutoSend.Viewing Logs
Auth0 captures every Custom Action execution, which is the fastest way to debug send failures. Go to Dashboard > Monitoring > Logs to view log events for your tenant. See Auth0’s View Log Events guide for filtering options. For the Custom Email Provider Action specifically, you can also inspect per-invocation output (includingconsole.error and any api.notification.drop reasons) from the action editor under Actions → Library → your action → Logs tab.
Email Templates
Auth0 still owns the email content when you use a Custom Action - the action only delivers what Auth0 hands you innotification.subject, notification.html, and notification.text. To customize the content, edit the templates under Branding → Email Templates:
- Verification Email - Sent when users need to verify their email address
- Welcome Email - Sent after successful signup
- Change Password - Sent for password reset requests
- Blocked Account - Sent when an account is blocked
- Passwordless Email - Sent for passwordless authentication (magic links/codes)
Auth0 email templates use Liquid syntax for dynamic content. Variables like
{{ user.email }} and {{ url }} are replaced with actual values before the rendered HTML reaches your action.Troubleshooting
Send failed: domain not verified
Send failed: domain not verified
AutoSend rejects sends from unverified domains. Update the
from.email in the action to an address on a domain you’ve verified in Domain Settings.Action runs but no email arrives
Action runs but no email arrives
- Check the action Logs tab for
Send failedentries. - Look up the recipient in the Email Activity dashboard.
- Confirm the address isn’t in Suppressions.
Test email goes to the wrong address
Test email goes to the wrong address
Only the last field of Auth0’s test form controls the recipient. The other fields are sample values used to populate
notification.* and don’t change where the message is sent.Next Steps

Verify Your Domain
Set up SPF, DKIM, and DMARC for better deliverability

Email Activity
Monitor your email delivery and engagement

Webhooks
Set up webhooks to track email events in real-time

Send Mail API
Reference for the AutoSend Send Mail endpoint used by the action